


Left Side Subframe Removal
The Left side Subframe mainly functions as attachment point for the fasteners that hold the wiring up on the left side of the bike. There is no similar piece of frame on the right side of the motorcycle. The Left Side Sub Frame may be removed to create more room to reach the top engine from the left side of the motorcycle. The LH side subframe may be removed permanently by adding a few small homemade brackets which I will cover in an upcoming tutorial.
Do first
Remove the Left Foreman, Left Lower and Left Side Fairing <<CLICK
Tools
10mm closed end wrench
10 mm socket
small screwdriver
8mm socket
12mm socket
torque wrench
non permanent locking agent
silicone lube
Removal
To deinstall the section of subframe from the left side of the motorcycle, remove the fasteners and bolts marked in the picture below. Refer to steps 1 through 9.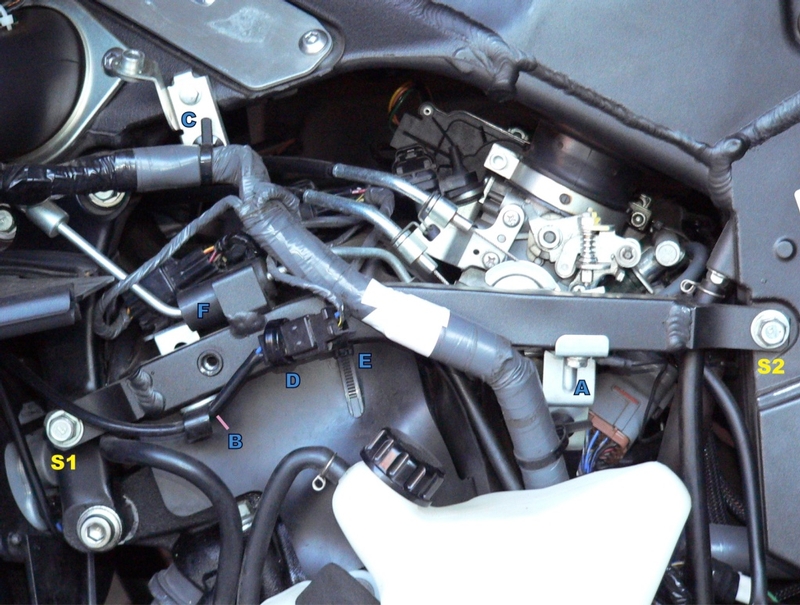
1. Remove the main wiring harness bracket [A] from the sub frame using a 10mm socket (note I have my Power Commander grounded here--the black wire is not OEM). 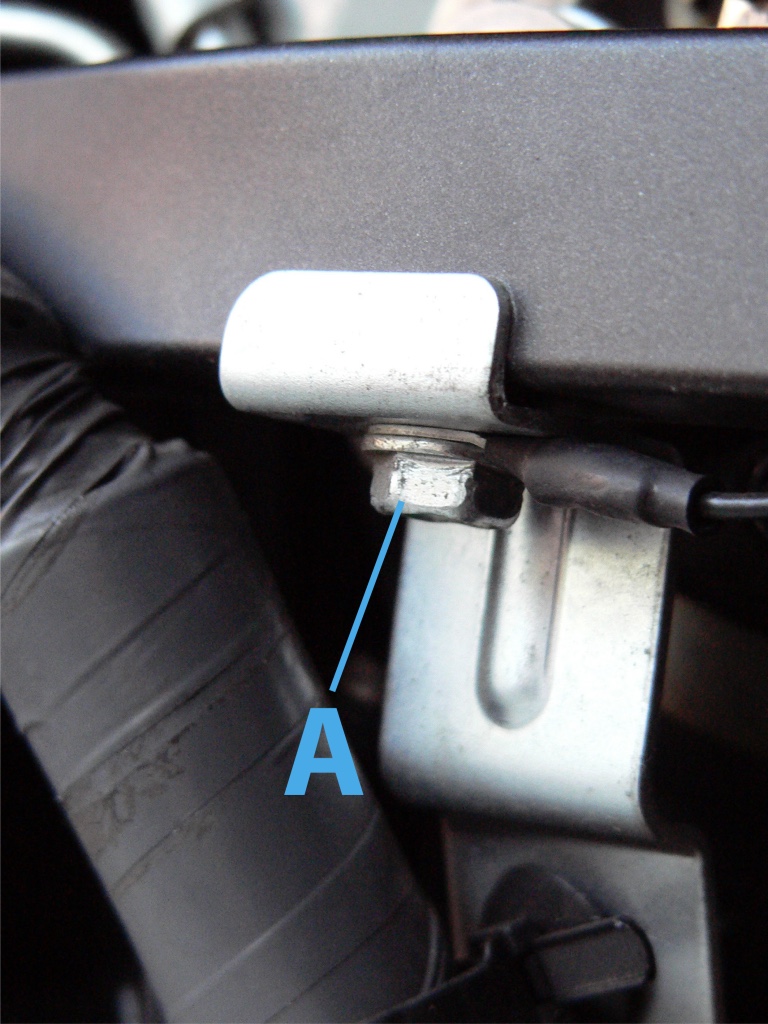
2. Unbend fan wire retainer tab and use a 10mm closed end wrench to remove it along with the bolt [B] and the bracket from the sub frame section. 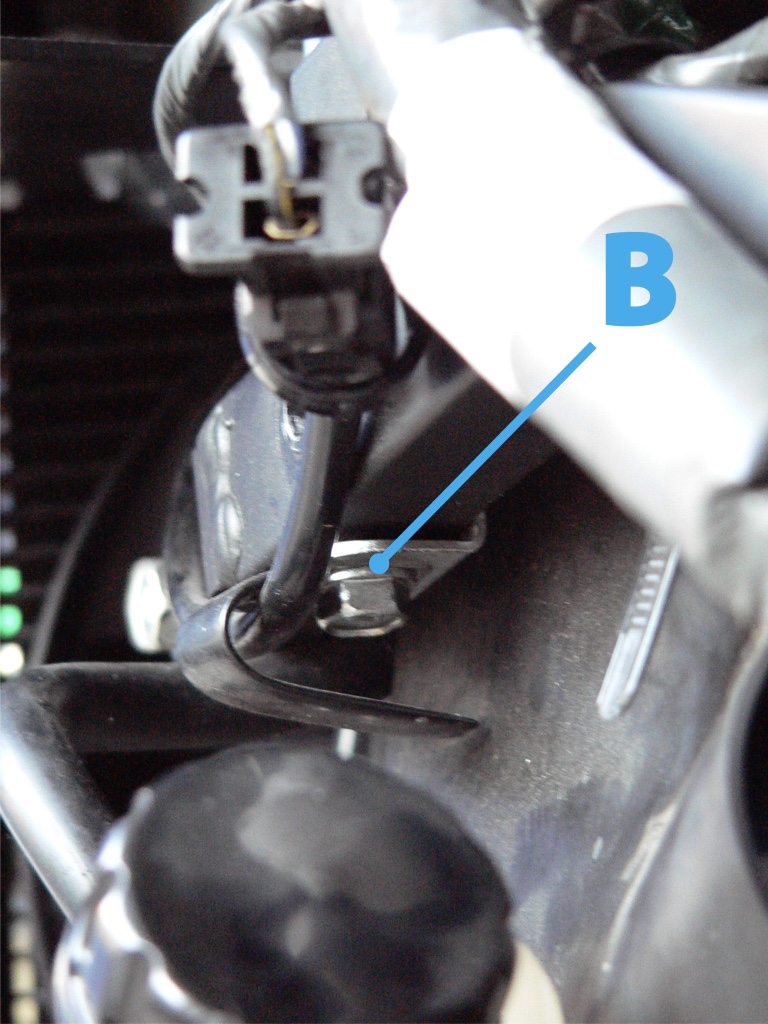
3. Remove the main wiring harness fastener [C]. 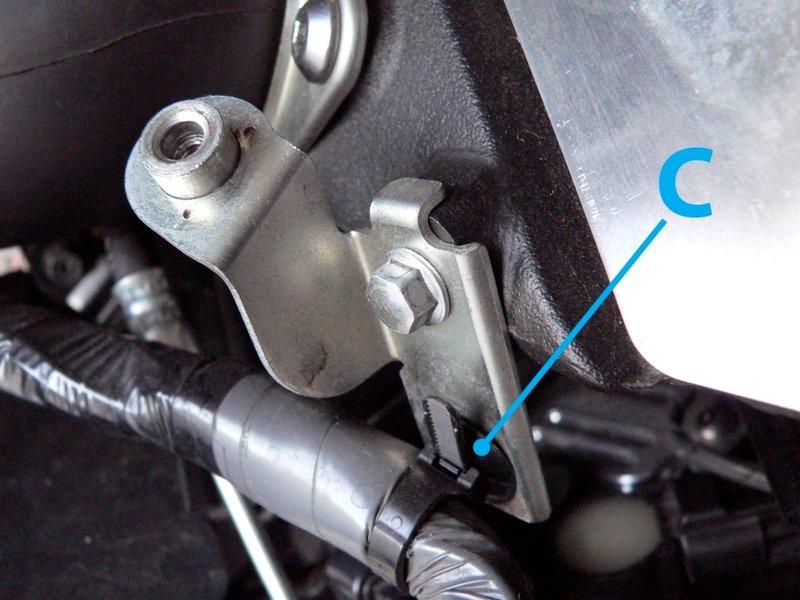
Press the release by inserting a small screwdriver, DO NOT CUT THIS Reusable OEM part. You may instead use an 8 mm socket to remove the fairing hanger that the zip tie is anchored through.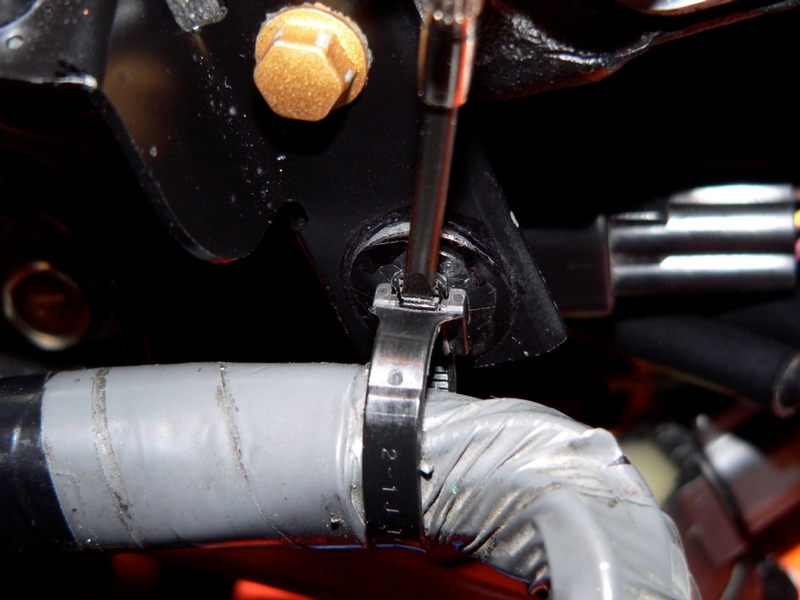
4. Pinch the fan wire retainer ring [D] as shown to misalign the beak so that it may be removed from the hole in the subframe section. 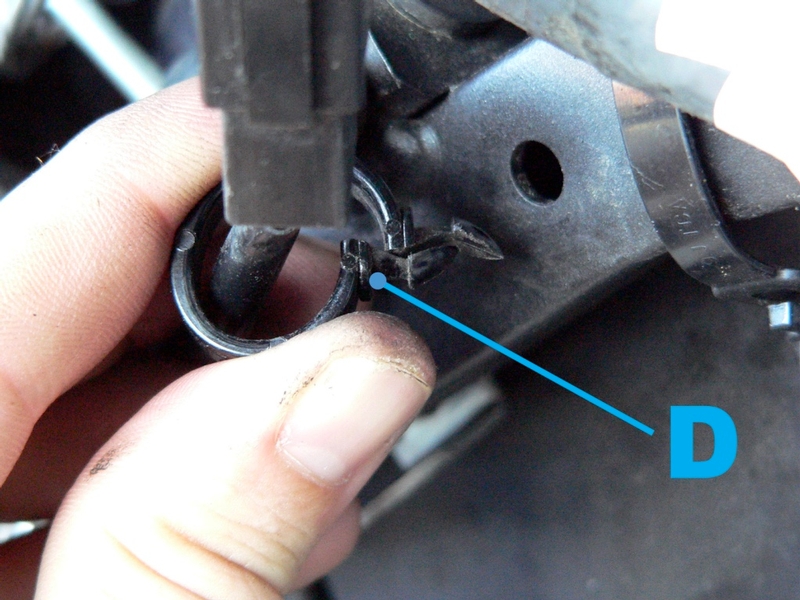
5. Locate the band [E] which retains the stick coil harness wire. Do not cut or discard this zip tie. It is a reusable OEM part.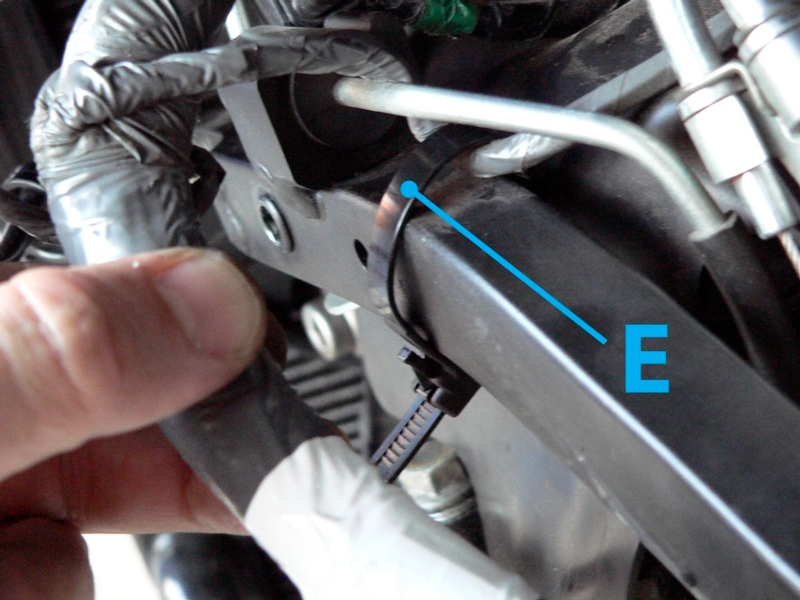
Press the tab on the ziptie to unlock it and slide the tongue out of the back. Remove it from the subframe section.
6. Push the rubber clutch line damper [F] backward over the clutch line tube and out of mounts welded to the subframe section.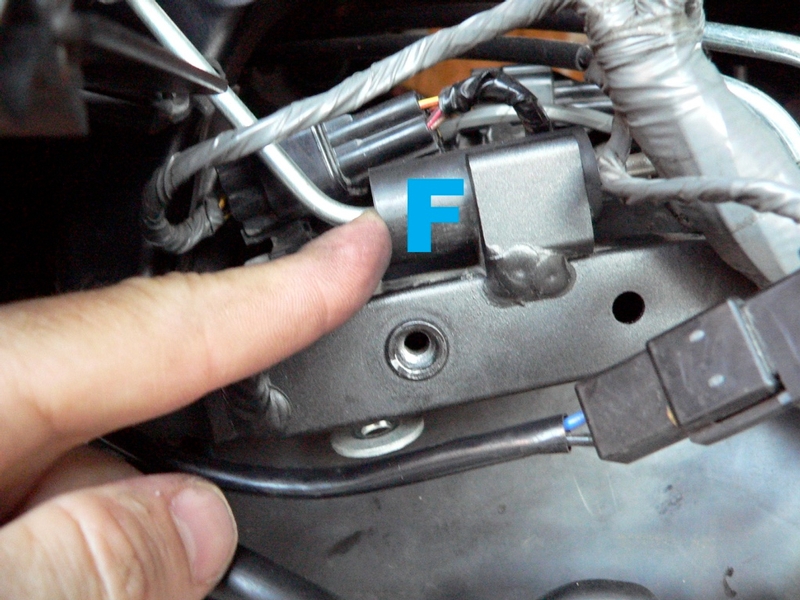
7. Use a 12mm socket to remove sub frame bolts [S1], [S2] and the washer with each. 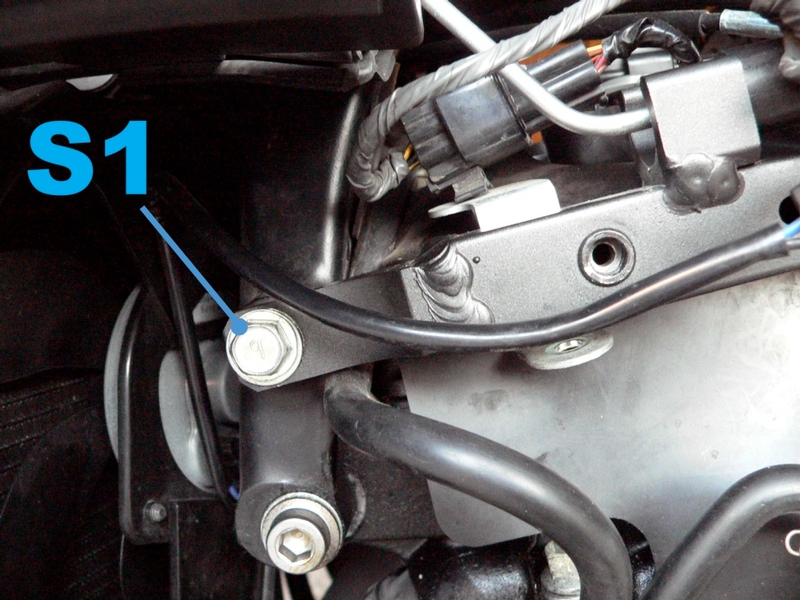

Remove the section of subframe from the left side of the motorcycle.
Installation
8. Install Subframe Member and the two subframe bolts [S1 and S2], each with
washer, to the left side using a 12mm socket (step 9). The bolts require non permanent locking agent. Use a torque wrench to properly tighten the LH subframe bolts.
Torque - LH Side Subframe Bolts: 17 ft-lb
Be sure to route the Clutch Line to the inside of the Subframe Member. The drainage tube from the back left corner of the airbox and the radiator overflow tube to the coolant reservoir also rout under the Subframe member.
9. Apply silicone lube to the rubber vibration damper on the Clutch Line [F]. Push the
rubber damper over the Clutch Line and into the mounts welded to the top of the Subframe Member (step 6).
10. Refasten the zip tie [C] around the large grey bundle of wires or use an 8mm
socket to tighten the bolt which fastens the wire retainer/fairing hanger to the exterior front air box (step 3).
11. Install the rear bracket [A] to the Subframe using a 10mm box wrench (step 1).
Basic torque spec for this 6mm thread bolt a is 52-69 in lbs.
12. Use a 10mm closed end wrench to install the wire retainer tab, the bolt [B] and the
wire connector lead bracket to the Subframe Member (step 2). 6mm thread bolt. Basic torque spec for a is 52-69 in lbs. Bend wire retainer tab around the wire to the fan.
13. Place ring retainer [D] around the connector leads. Skew beak points and insert them into the hole in the Subframe Member (step 4).
14. Fasten stick coil sub harness connector wire to subframe member using the OEM ziptie [E] (step 5)
* Last updated by: Rook on 1/7/2018 @ 3:54 PM *