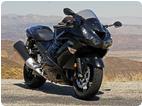


I use my ZX-14R mostly for 1 hour to 3 hour rides on our gorgeous Vancouver Island roads, but I want to be able to go "touring" when the urge hits me.
I have a pair of Nelson Rigg saddlebags and tank/tail bag left over from my Yamaha R3 mini-tourer project (just to show that a 299 lb, 320cc, 60 MPG sportbike CAN be equipped to tour!).
Here's how I adapted them to make a cheap and quick touring solution - all done today between errands and family responsibilities for a total of $10 CDN (= $7.50 US).
I started with just the Nelson Rigg saddlebags (tailbag later), which look like this:

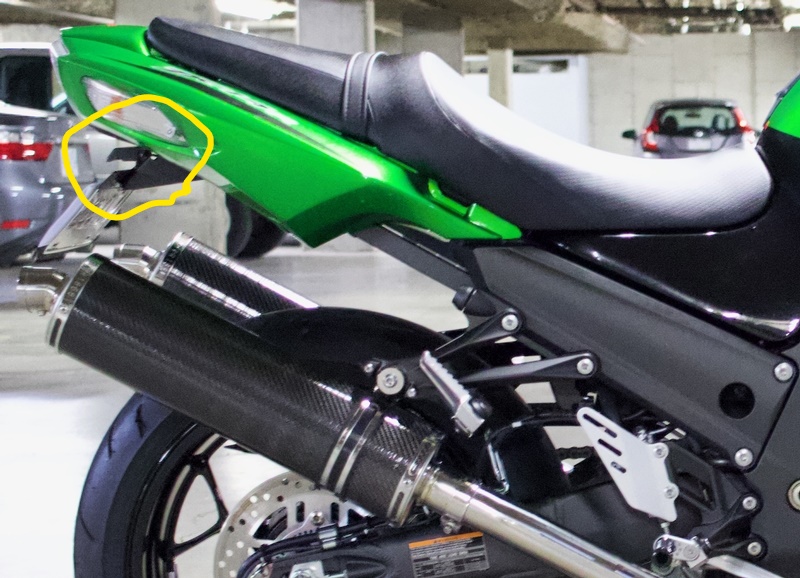
The 2 wide "straps" that join the 2 bags are actually velro-faced and fully adjustable for the distance between the bags, so they will fit virtually any bike. You normally throw these over your bike's rear seat, but a smarter idea is to use the key to unlatch the seat and remove it, and then place the straps over the exposed rear section of the bike, IF that is possible to do without running into either seat latches or seat rubber block supports. On my 2017 ZX-14R, it IS barely possible to find a spot where the straps narrowly avoid 3 "holes" into which 3 projections on the OEM seat fit. Here's the one and only position that "works" with threse particular bags which have good wide, sturdy straps:
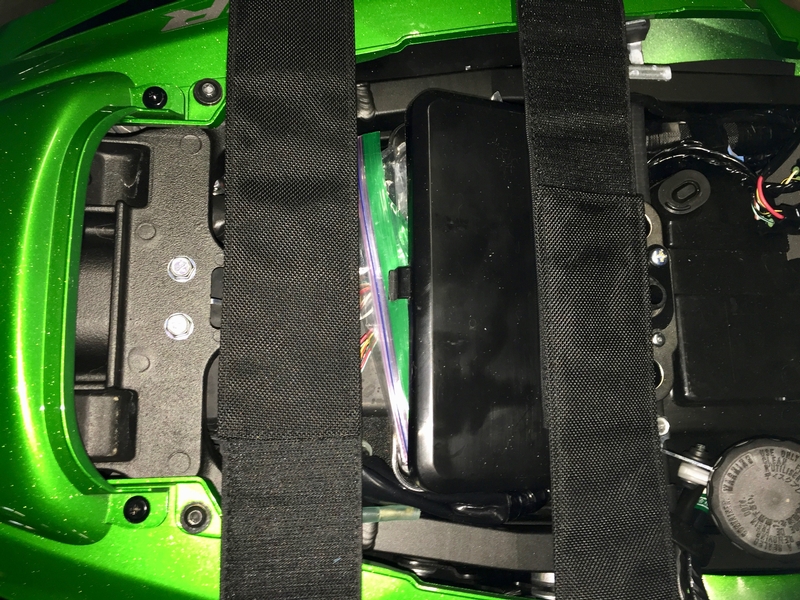
If you look very carefully just barely to the left of the leftmost strap, you see a long narrow slot into which a seat latch fits. If you look just barely to the right of the rightmost strap, you see the 2 holes into which the seat pins insert. There is JUST enough clearance for the straps to fit without interfering with any of the 3 "holes". Plus, the straps manage to avoid every single rubber "blocK' that supports the seat above the frame!c (Lucky or what?)
Once you have the straps adjusted to the right length (which you do only ONCE and then leave them permanently in that velcro setting), you simply throw the bag assembly onto the exposed bike frame, align to make sure all 3 holes are visible, and then snap the seat back into its locked position. Now the bags are not only "mounted", they ate secured as well, since the locked seat prevents their undamaged removal.
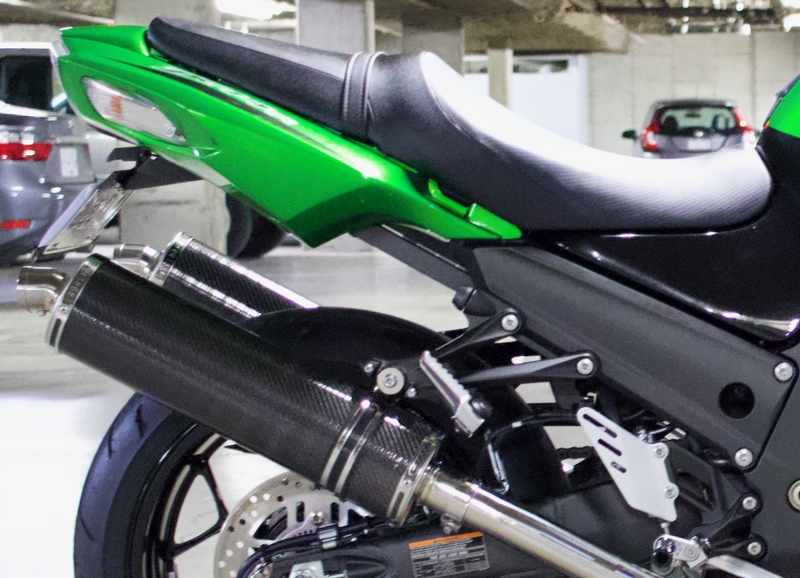
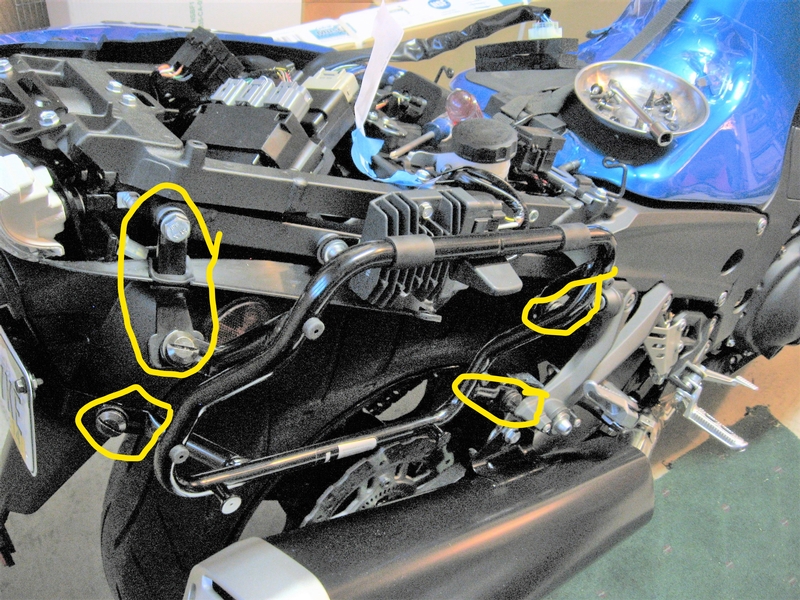
Now these saddlebags can sometimes "sag" INward at the bottom when loaded up, getting close to my aftermarket exhaust mufflers. Since the mufflers are Delkevic carbon fiber mufflers, they NEVER get "hot". Just warm. Nevertheless, I don't want the bags swinging against the mufflers when I go over bumps, etc, so I needed a "bag separator". That looks like this U-shaped aluminum piece, that the local Metal Supermarket branch (look them up - VERY cool) made for me, in about an hour this morning, while I ran other errands. Incredibly, the man charged me a total - material and labour - of $10. (Yes, ten dollars - Canadian = $7.50 US):
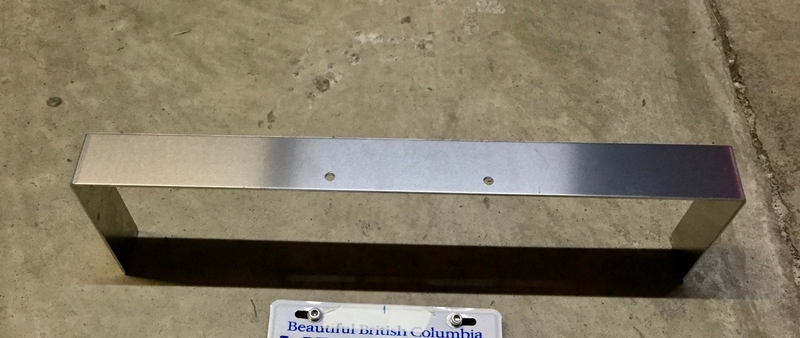
As the photo implies, it mounts via the same 2 pre-existing holes in my Chinese fender eliminator that hold the license plate. I know this "works" because:
1. There is really no vertical "load" on this separator at all, and the only "loading" that ever occurs is the 2 saddlebags leaning slightly against it from opposite sides when the bags are full, and the occasional "bump" horizontal loading.
2. Plus, I have done this before, successfully, on the Yamaha R3, and hauled considerable stuff in the bags.
Plus, the separator goes on or off in minutes just by removing the license plate screws, so I can be "ready for a trip" in minutes of mounting work, inclusing both the separator and the bags.
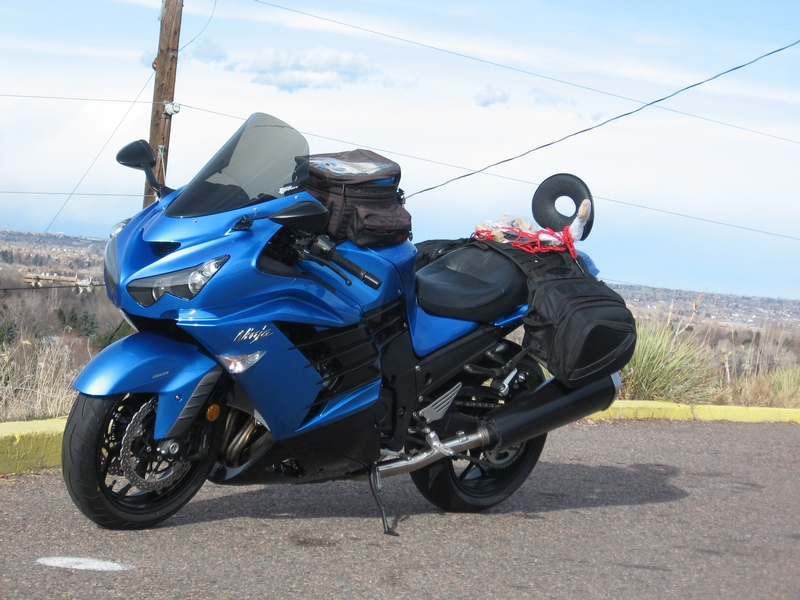
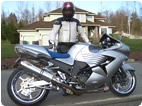
When mounted to the bike, this is what the bike looks like in profile:
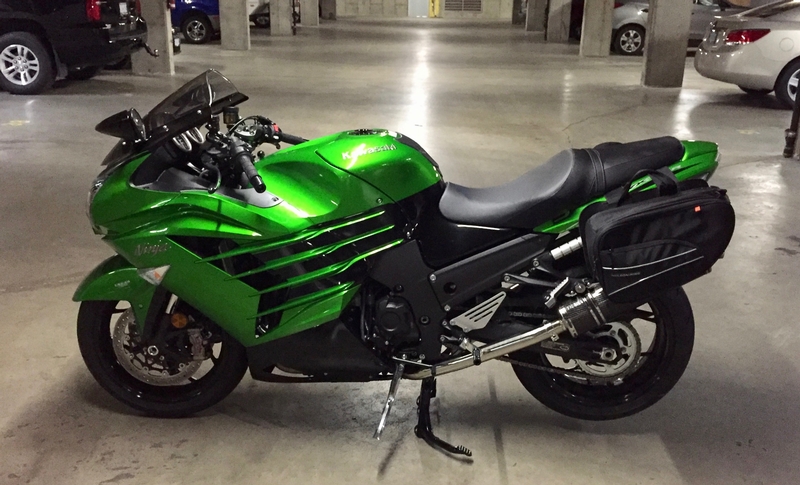
Note though that if you are running the OEM supersized bazooka mufflers, the fit might not be as good!
Here's the view from the rear:

The maximum width across the bags is 35 inches - not bad considering that the ZX-14R's butt is, uh, "a little wide". Again, things would be a bit (a LOT?) wider with the OEM mufflers.
The strap across the bike, between the 2 bags, below the taillight and signals, and above the license plate, is there to keep the bags pressed closely to the separator and to prevent sideways bag-flapping when I hit a bad bump. Yes, I know I need to find a cleaner strap for that job, and I have a library of Thule tiedown straps from which I will cut a just-right custom length that will look professional. This strap, like the 2 wide top straps, NEVER comes off the bags. The bags have carry handles and I just carry them both together to the hotel rooms since I travel with luggage more akin to a cowboy than to a safari hunter!
Note that when I am not touring, there is NOTHING on the bike related to these bags - no framing, no straps, nothing.
Hopefully, this might inspire someone else who only plans to tour occasionally and/or does not want to clutter up his/her ZX-14 with a permanent luggage rack or saddlebag frames or mounts, and/or does not want to spend several hundred dollars on a carrying solution. As I said above, I paid $10CDN for the separator, and about $150 or less for the Nelson Rigg bags. The bags come with rain covers too, but I also waterproofed them so the rain covers are not critical - just extra dryness insurance.
Jim G