Move Close
Welcome to zx14ninjaform.com!

You are not logged in.
New Topic Reply
Next Page

Page: 1

Previous Page

Thread: Cowl removal

Created on: 04/29/09 07:11 PM

Replies: 8

velocity111


Joined: 04/29/09

Posts: 36

Cowl removal
04/29/09 7:11 PM

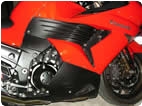
I'm trying to remove the front cowl, and have already removed all other plastics. The cowl seems to be loose everywhere except for the lower center part of the cowl. I'm removed the screw, but the service manual on pg 15-11 references a central pin which needs to be pushed. I believe this is what's still holding the cowl on, but the manual doesn't show or explain how to release this pin.

Any clue - do I push direct and straight on it, or do I insert a flat head screwdriver and press the pin upward, etc??

Help!!

Thanks in advance,
Nils
Link | Top | Bottom

Rook


Rook's Gravatar

Joined: 03/28/09

Posts: 20589

RE: Cowl removal
04/29/09 7:55 PM

I use a small allen wrench ~1mm wide to push the center button of those things in. It's the same deal as the large quickpin rivot that holds the loweres together. Push the middle button in, pinch the outer circumference of the rivot with your fingernails, pull it out. It's easy once you figure how those things work.


'08 MIDNIGHT SAPPHIRE BLUE Now Deceased

Link | Top | Bottom

velocity111


Joined: 04/29/09

Posts: 36

RE: Cowl removal
04/29/09 8:12 PM

Just to make sure - I'm not talking about the quick rivets that holds the black tray that sits above the front fender. There is a central pin which sits on the top side (inside) of the lower center front cowl - there is only one, and it sits towards the front of the lower cowl making it somewhat difficult to access - and impossible to see.

Are we talking about the same center pin??

Link | Top | Bottom

Grn14


Grn14's Gravatar

Location: Montana

Joined: 02/25/09

Posts: 15511

RE: Cowl removal
04/29/09 9:57 PM

Hey Velocity.Your info is on page 15-13 of the service manual.What you're looking at on page15-11,that "A" that's circled there-that's actually ON THE UPPER PLASTIC PLATE(one on each side)The CENTRAL PIN they're talking about is the PIN INSIDE THAT RIVET. There is however a BOLT IN THE VERY CENTER PG15-14,bottom picture(at the nose)(it's a little prick,so I replaced mine with a Phillips!) If that's not removed,the cowl will not slide forward. (use the allen wrench like ROOK and HUB said for the rivet-the center will pop out when ya push it in as long as ya don't keep it pushed in)


* Last updated by: blue07 on 4/29/2009 @ 10:28 PM *

Link | Top | Bottom

velocity111


Joined: 04/29/09

Posts: 36

RE: Cowl removal
04/30/09 7:19 PM

Blue - thanks for the info.

I thought I could just take the upper fairing off, but it looks like I need to take the fairing with the lights out together first, then separate the fairing - I was trying to avoid taking the headlights off.

I've taken the bolt out thats shown in 15-14 already, and the upper inner fair is removed, but the fairing isn't moving.

If you look at the top of 15-15, the top pic, in between the "B"s you see what looks like a bolt. If you were to continue down that triangle shape toward the front of the fairing - that is where the fairing is still securely attached to that bolt/hole looking triangle. The picture shows the underside of the fairing front lip - direct on the other side is where things are attached.

It's the little things that always get you!!

Link | Top | Bottom

Grn14


Grn14's Gravatar

Location: Montana

Joined: 02/25/09

Posts: 15511

RE: Cowl removal
04/30/09 8:09 PM

Hey Velocity-Take that plastic "plate" out of there-it slides rearward and pops loose like in the pic on 15-15 top.You removed the pop rivets there on that piece didn't you?If you go back farther on that piece,you see where it "sits" on top of the plastic "lip"(at the rear of it)You have to push it either up at the back,as you slide it loose,or down,I can't remember.You may not even HAVE to remove that piece to get the cowl off.That mount point you're referring to is for the bolt that attaches that flat piece under the nose.It doesn't fasten to the frame.I don't remember having ANY type of obstruction right there when I replaced mine.I would say-remove the TWO BOLTS ON THE METER BRACKET-PG 15-15 second picture,circled "B".As long as your electrical connections are unplugged,removing those TWO bolts will allow THE COMPLETE COWL WITH HEADLAMPS to come forward and out.(you won't need to remove the bolts directly below the windshield there to do that(on that mirror bracket).If you look on pg 15-8,you will notice there is NO attachment point OR fasteners holding that triangular piece to the frame.I know it's intensive getting the electricals unhooked,but it's so much easier to take the WHOLE COWL unit with the meter and bracket out.Then you can get to the lamps or whatever you need there.And you won't have to "line a bunch of parts back up" to install the unit.Remember the RAM INTAKE-It will unfasten at the nose there when you pull the cowl out.So your mid-fairings are off,right?And it's clear on the attachments right and left at the airbox points,yes?


* Last updated by: blue07 on 4/30/2009 @ 8:27 PM *

Link | Top | Bottom

velocity111


Joined: 04/29/09

Posts: 36

RE: Cowl removal
04/30/09 10:14 PM

Blue - you're correct. I ended up slightly bending that tab shown in the picture to get a phillips onto the screw which was hidden, and the fairing slipped right off.

Couple more questions:

1. Do I need to remove the radiator to change out the head pipes?

2. When I bough the bike, the previous owner replaced the rear sets and pulled the pressure switch off the rear brake cylinder, so the bike had no rear brake light. I have a new pressure switch and tried to install it, but it seems to have a slightly different thread pitch that the banjo bolt I removed, but I couldn't tell. My tap and die set didn't have the right size to verify that they were or were not the same. I assumed these bolts are an industry standard size, and have never heard of a banjo style bolt not fitting - what can I do to clean out the master cylinder threads without dropping a bunch of crud into the cylinder?

3. I have the roaring toyz swinger extensions - anyone know of an installation diagram?

Thanks,
Nils

Link | Top | Bottom

Grn14


Grn14's Gravatar

Location: Montana

Joined: 02/25/09

Posts: 15511

RE: Cowl removal
04/30/09 10:24 PM

Glad ya got er out okay!As for the pipes and stuff-not sure.Is it a stock Master?The switch you're referring to-at least the STOCK switch-has NO connection to the Master.It operates with pedal position via springs.If you're using a workable master setup,you should be able to fab something to hold that switch in position aside from the Master.


* Last updated by: blue07 on 4/30/2009 @ 10:48 PM *

Link | Top | Bottom

velocity111


Joined: 04/29/09

Posts: 36

RE: Cowl removal
05/01/09 1:26 PM

None of the stock electrics for the rear brake light were on the bike, so I previously got a pressure switch/banjo bolt which you screwingo the top fo the master cylinder and connect to the wiring. I found out today that when i ordered this sensor, there is a 1.00 thread pitch aftermarket unit for the Brembo / Nissin units, and a 1.25 TP for the OEM units - I have the 1.0 and need the 1.25 - hence why it wouldn't install properly. New on is on the way, another issue down, 1000 more to go....lol

Link | Top | Bottom


Welcome to zx14ninjaform.com!
 
New Topic Reply
Next Page

Page: 1

Previous Page

New Post

Please login to post a response.