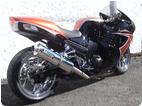
How many of ya'll are tired of seein that gap in the midpanelfront,where she connects to the upper cowl.That pointy area right there.I thought so!Okay-here's the fix.........remove the inside fasteners from the upper panel piece(that shovel shaped piece)Leave the nose bolt attached,do not remove the piece itself from it's position.Take the rear part of that fairing ,where the tab is located,and pop that tab "above" the inner fairing mating edge -just at the rear of it,not all the way along it.Now,push up in the center of the rear portion of the inner above fairing piece.See the holes already predrilled?You want to drill two holes that will match up with the already stamped out holes there(one on each side).Drill the holes while maintaining upward pressure on that panel(to align the hole where it will be when you finally insert the screws).Once drilled,the "tabs" will now be sitting on top of the rearmost part of that piece.Now insert on each side there a screw with a good bite on it.(not an SAE thin thread)something like a small wood screw.To get it to tighten up the seam at the front on either side there-loosen your upper fairing bolts(on the outside seam(3 each).Tighten the inside bolts under the "black panel piece".Apply pressure to the inside upper piece,insert your screws now into the holes-by flexing that upper piece,you will see how the fitment at the fairing seams at the front will pull together.Once pulled together, tighten the outer fairing screws(factory ones).Tighten again your bolts where the "above fender fairing"connects.Tighten down the new screws.You're done!She should be much tighter right there at the front seams now-if not,just work with it till you adjust it all nicely-The new holes must be drilled while the pressure is upwards on the inside upper panel.This will keep a "bow" which will apply pressure to the whole inside front of the fairing work there when the screws are installed.NOTE:the two "new" screws need not have a fastener installed to them-they will hold in there from the bowing action of the upper panel.CAUTION:I would NOT use a screw with a pointed end on it.
* Last updated by: blue07 on 12/29/2009 @ 3:07 PM *


