


Cylinder Head Cover Removal
The Head cover is removed to inspect cam shafts and lifters and also to remove those parts.
Removal of the head cover exposes a large area of the inner motor so precautions should be taken to prevent contamination by dust, dirt and other foreign matter.
The ZX-14 Service Manual recommends that the head cover gasket be replaced. The part number for the head cover gasket was changed in 2010 which may indicate that the part has been improved. The ZX-14 Service Manual does not mention replacing the 6 head cover rubber cushioned washers (ring-os). The original set of ring-os installed may have lost resiliency so replacing them may be something that would improve the seal of the head cover gasket for a minor additional cost. The ring-os were also updated in 2010. Refer to Cylinder Head Gasket Washer Fix to seal a gasket that that has leaked prior to removing the cylinder head cover or leaks after installation.
There is a danger of damaging the aluminum threads the head cover screws are torqued into. Use a torque wrench and and check TORQUE WRENCH CALIBRATION first.
This is one of many threads about valve cover leaks on this forum. Note gverver’s posts about updated ring-os and head cover gasket on p3 of the thread linked below. Also my EDIT 6 posts below gverver’s.
Remove Foremans, Ram Air Covers, Tank Fairing, Lowers and Side Fairings
Remove Air Switch Valve (see Air Switch Valve Removal, Block Off Plates Install, steps 1-7)
Remove Throttle Bodies Assembly (not required but recommended)
Remove Stick Coil Subharness
Remove Engine Subharness
Remove Engine Heat Insulator Rubber Plate (at least from the head cover)
Remove Stick Coils.
Tools:
10mm socket
10mm ratcheting closed end wrench
head cover gasket (Kawasaki part #11061-0738)
TheeBond Liquid Gasket TB1216B (Kawasaki part #92104-1064)
or GM Engine Sealant (Hub Recommended and much cheaper)
4 new spark plug well gaskets (Kawasaki part #11061-0196)
(highly recomended) 6 new head cover ring-o washers (Kawasaki part #92055-0143)
universal joint attachment
1/4 in drive 3 inch extension
Removal
1. Use a 10mm socket to remove the 6 head cover bolts (marked by red dot) along with the bolt gasket and washer that goes with each. All of the bolt gaskets and washers stuck firmly in place on the cover when I removed them. 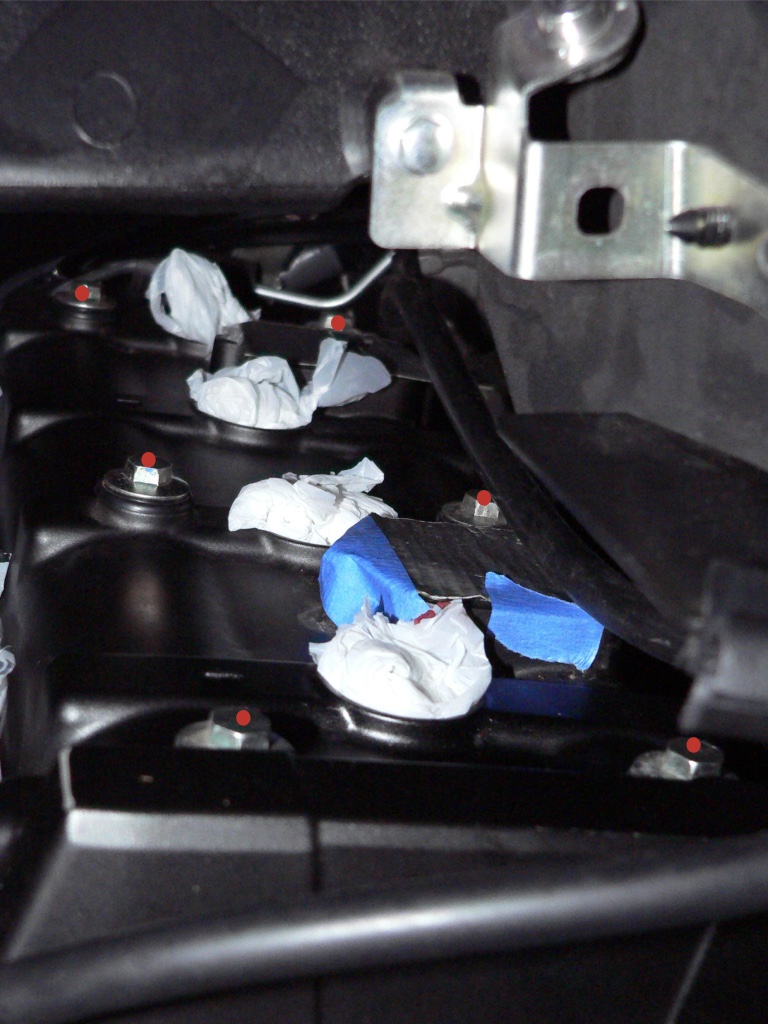
A ratchet and standard socket will not fit under the frame to fit on the left front bolt. A flatter tool such as a 10mm ratcheting closed end wrench will be necessary.
2. Lift the head cover to the rear and clear of the two small radiator hoses That are routed over the cover. The head cover is very light aluminum weighing less than a pound. Pull the head cover out of the engine compartment to the right of the bike.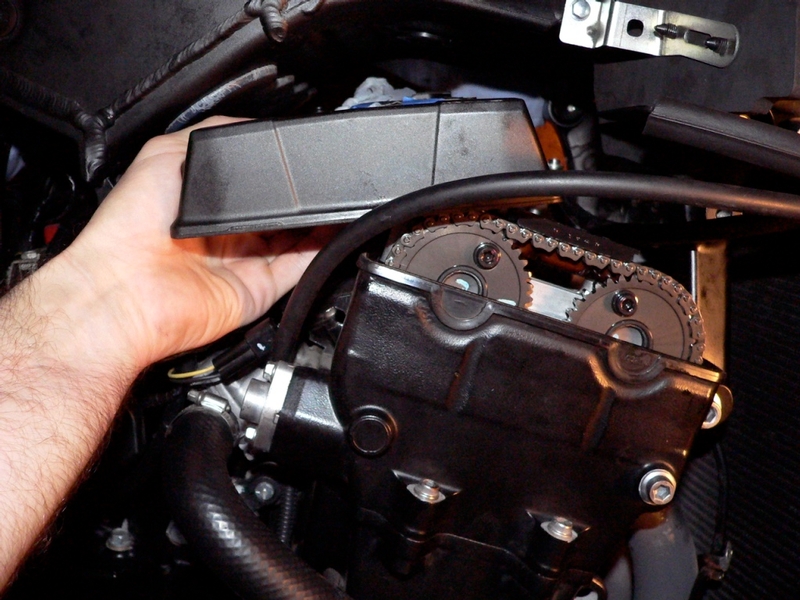
Place the head cover back on as a dust cover if the head is left open for an extended period of time.
Installation
3. Many owners have reused the existing gasket if it is in good condition. The ZX-14
Service manual recommends that the head cover gasket (Kawasaki part #11061-0738) be replaced.
GASKET REPLACEMENT
Twist the old gasket back and forth to unseat it and pull it off of the edge of the engine case.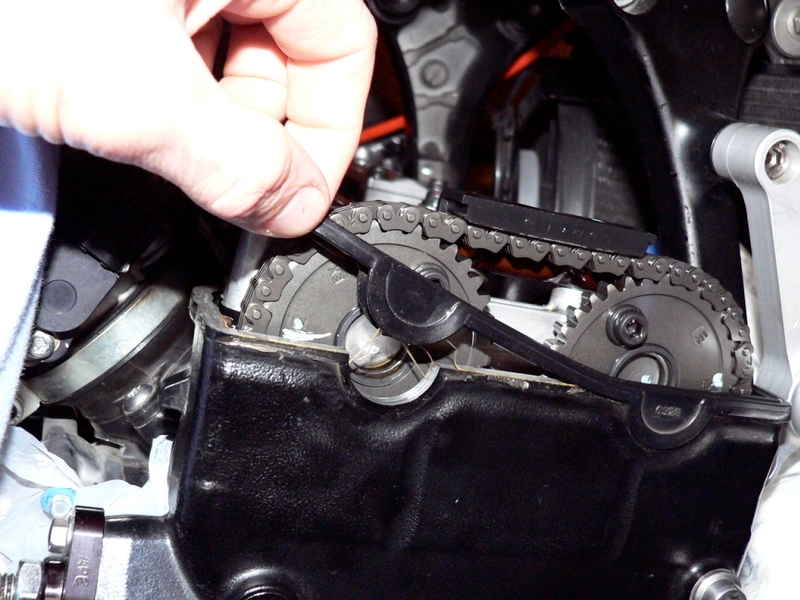
Use you fingernail to scrape the old gasket material off of the top edge and outside of the engine case. Be careful to not let any loose pieces enter the engine case. 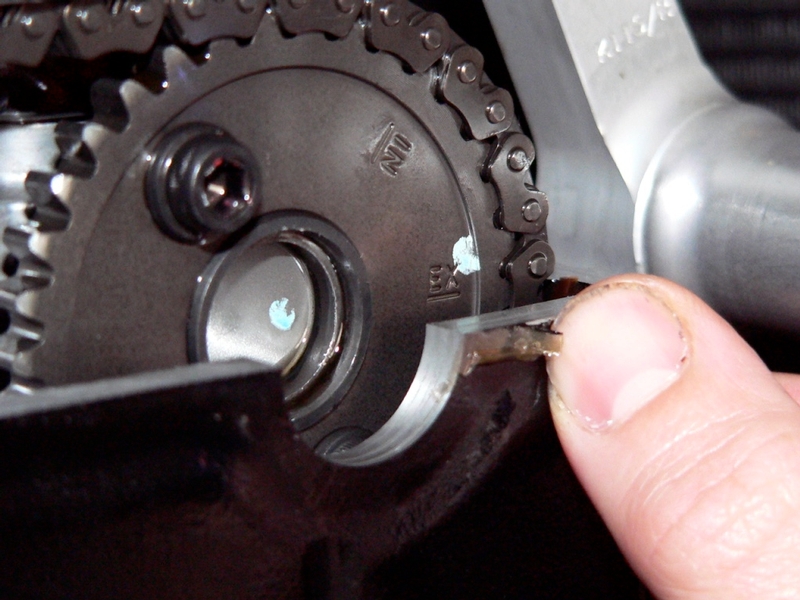
I think it is best to leave any old liquid gasket that is adhered to the inside of the engine case alone. It would be hard to tell if any loose pieces remained after it was scraped clean. If the camshafts are removed and the inside of the engine case is easily accessed, that would be a good time to remove all gasket material inside the edge of the engine case.
Wipe all oil from the edge of the engine case and follow that by wiping the edge with a clean cloth moistened with denatured alcohol. I did not wipe the inside surface of the engine case to avoid loosening any chunks of dried liquid gasket that may have been adhered there.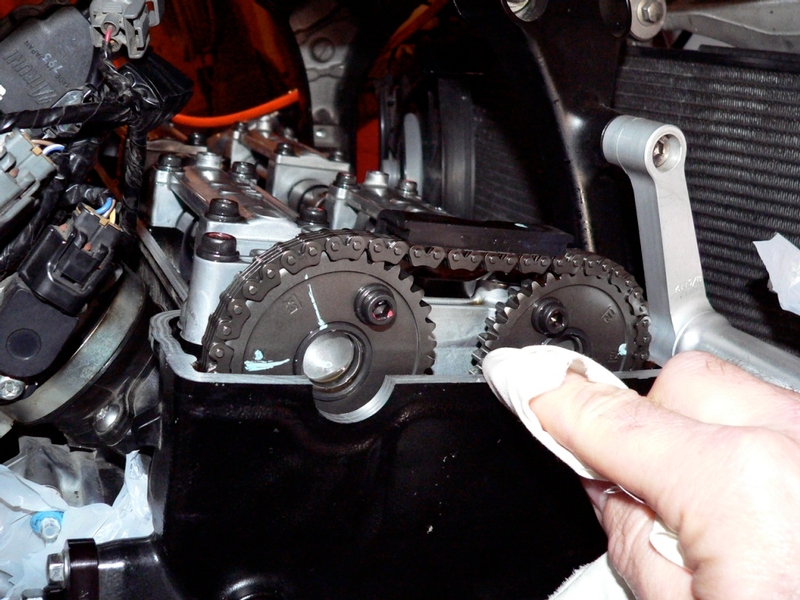
Fit the gasket to the engine case and then lift left and right sides to apply ThreeBond Liquid Gasket (Kawasaki part #92104-1064) on the half circle indents in the head wall where the four rounded humps of the gasket fit.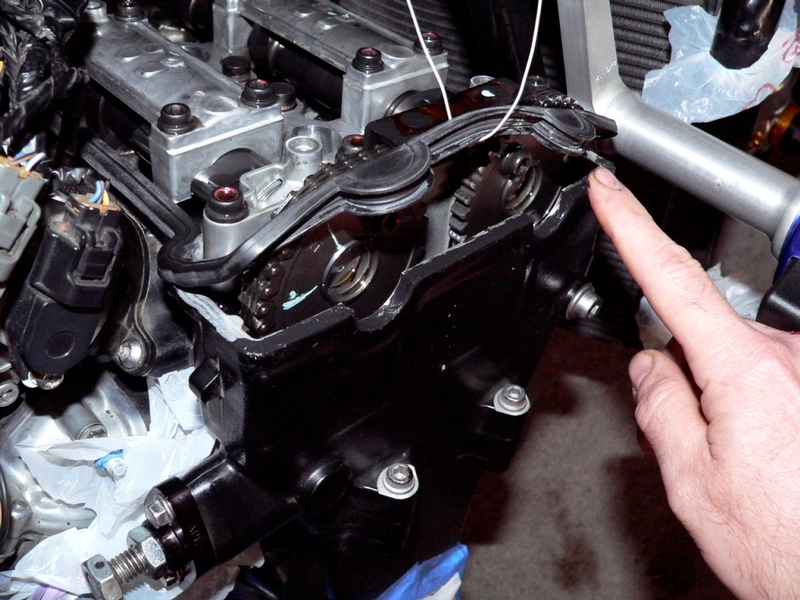
I applied the liquid gasket to the entire right and left side because that is how the factory installed gasket was sealed. I avoided applying the sealant at the inside of the top edge to minimize any liquid gasket that would get squeezed to the inside of the engine case.
4. Install 4 new spark plug well gaskets (Kawasaki part #11061-0196) in place of the old ones. Make sure that each of the 4 dowel pins that the spark plug well gaskets adjoin are in place in the head.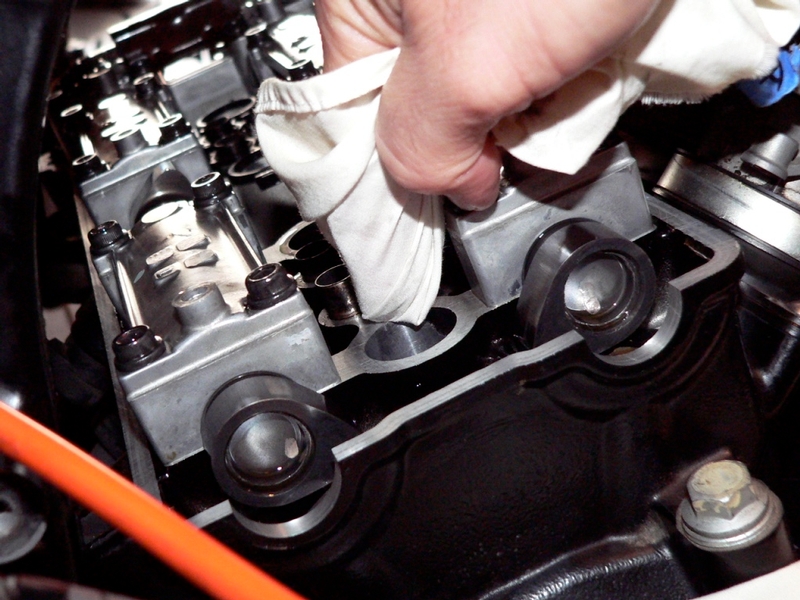
Wipe oil from the entire surface the spark plug well gasket adjoins and follow that by wiping the surface with a clean lint free rag moistened with denatured alcohol.
Install the new spark plug well gaskets.
5. Place the head cover over the head cover gasket.
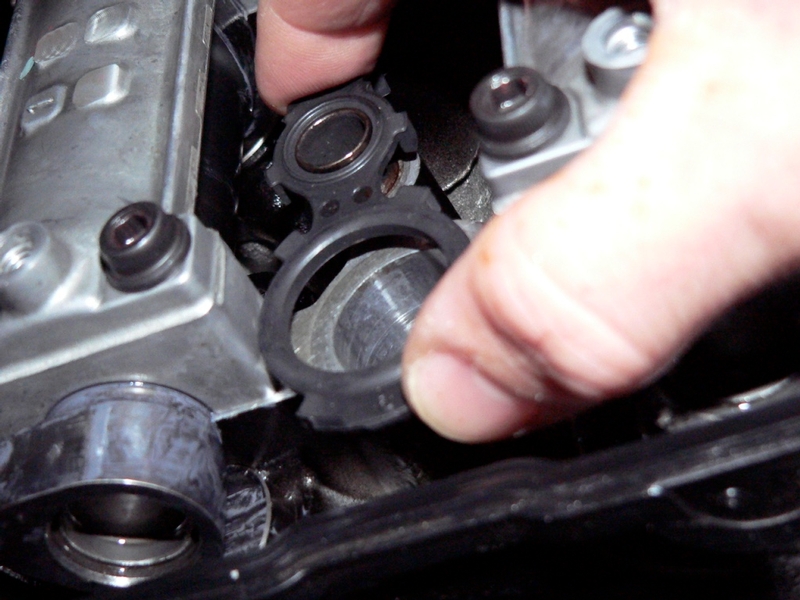
If replacing, position a head cover ring-o washer (Kawasaki part #92055-0143) over each bolt hole in the head. The washer’s metal surface should be facing up (all six of the original washers remained stuck to my head cover as they were installed and I reused them). Loosely thread 6 Head Cover Bolts through the washer and the cover.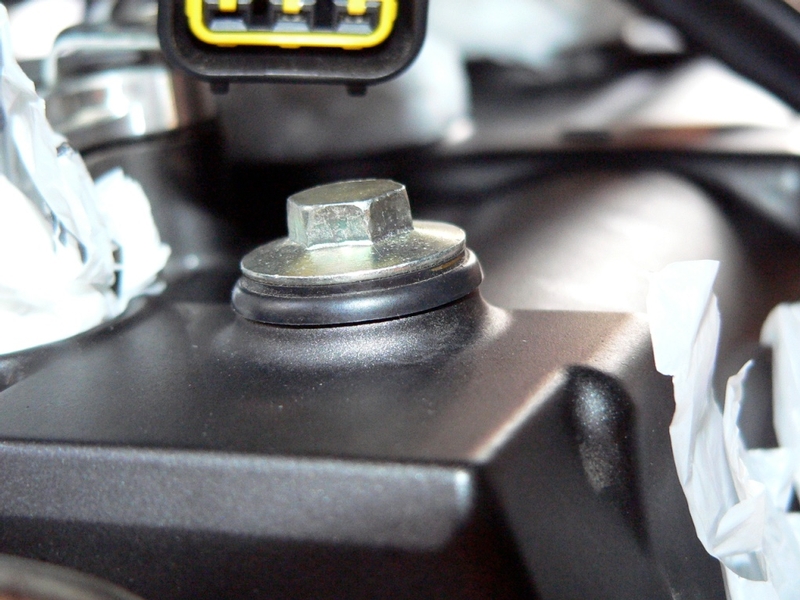
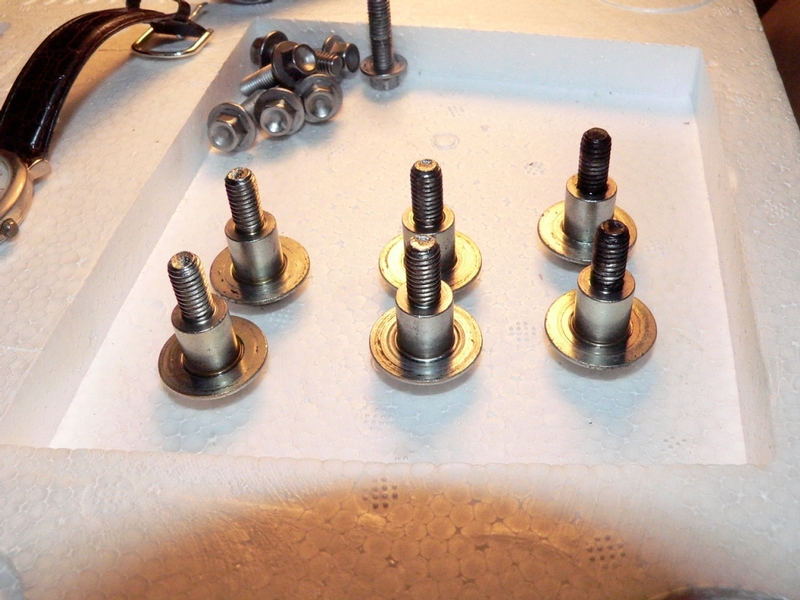
The head cover bolts have a shoulder which is designed to be tightened against seats in the camshaft caps inside of the head. This creates a definite point where the bolts should stop being tightened. The threads in the camshaft caps are aluminum and they will easily strip if the bolts are torqued too much.
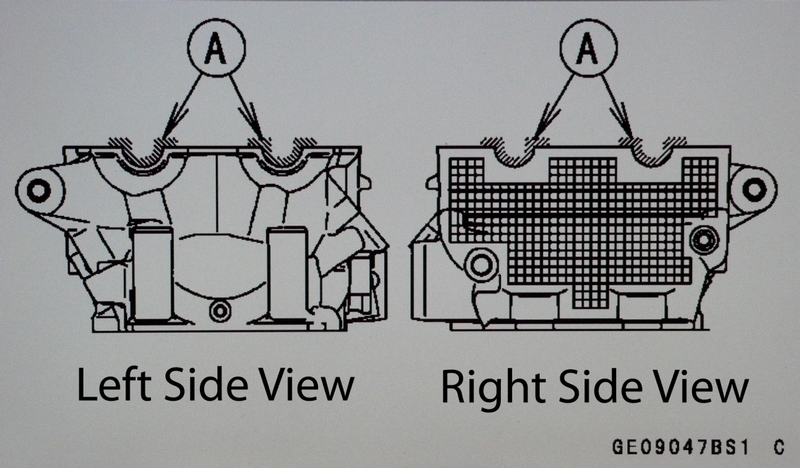
6. Gradually tighten the bolts in steps according to the sequence shown below. Torque the head cover bolts in the same sequence. Torque - Cylinder Head Cover Bolts: 9.8 N·m (1.0 kgf·m, 87 in·lb)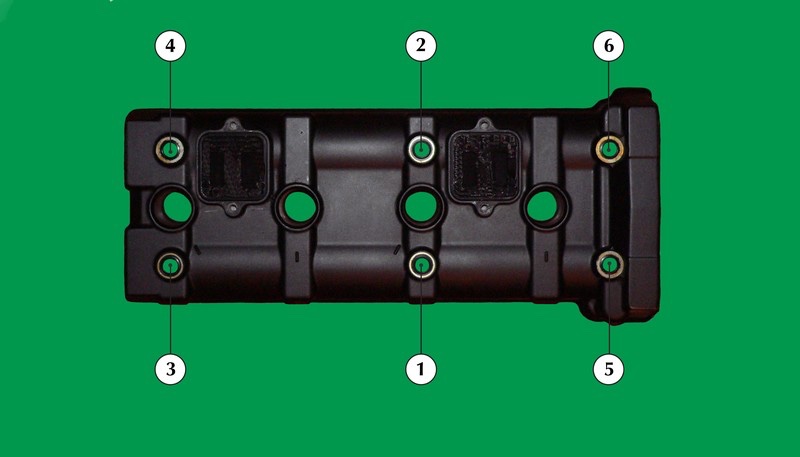
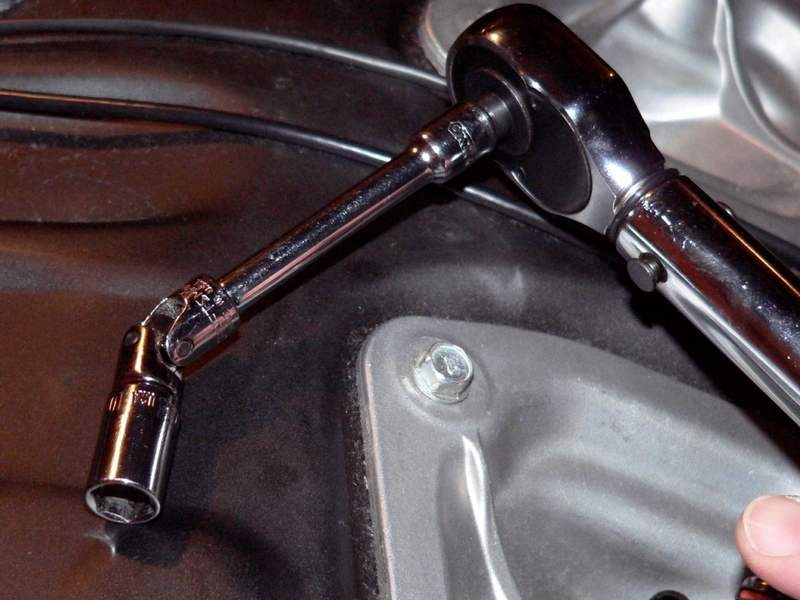
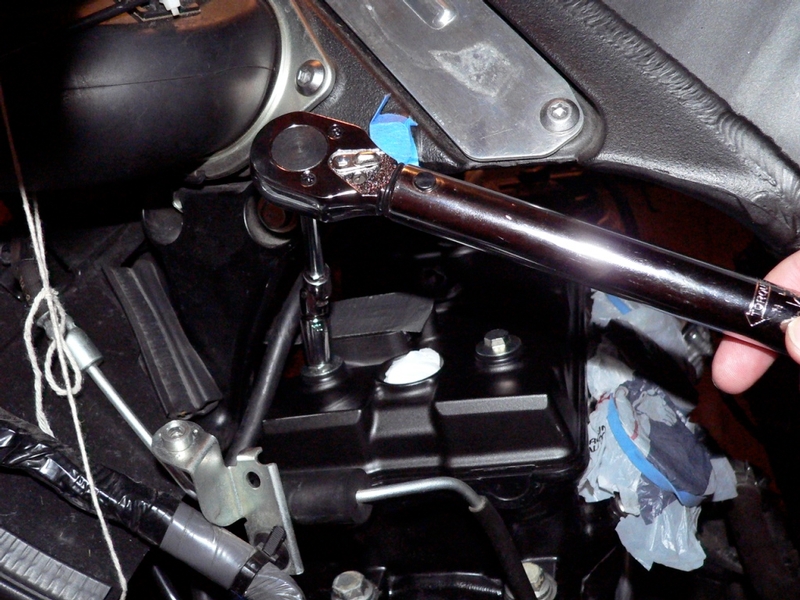
The left front head cover bolt is positioned in a spot that does not allow a socket to fit. All that can be done is to tighten that one with a 10mm wrench. Match the feel of the tightness to the other left bolt. Though usually not recommended for accuracy, a universal joint attachment and a 1/4 in drive 3 inch extension may be used to check the final torque.
Install Stick Coils.
Install Engine Heat Insulator Rubber Plate
Install Engine Subharness
Install Stick Coil Subharness
Install Throttle Bodies Assembly
Install Pair System (see PAIR Removal Block Off Plates Install, steps 1-7, reverse procedure)
Install Throttle Bodies Assembly
Install Pair System (see PAIR Removal Block Off Plates Install, steps 1-7, reverse procedure)
Install Foremans, Ram Air Covers, Tank Fairing, Lowers and Side Fairings
* Last updated by: Rook on 1/6/2018 @ 12:49 PM *