


Display File Manager 1.0.4
Display File Manager is a software used to move data log files and map files from the LCD-200 or POD-300 to the computer so the files can be viewed and stored. Display File Manager may also be used to move map and log files from the computer to the LCD or POD. This tutorial will only deal with moving files. Step 12 has links to tutorials that deal with viewing the files. The term, “device” will be used to refer to both the LCD-200 and the POD-300 for the remainder of this tutorial.
Display File manager may be downloaded to a PC for free. See Downloading and installing Dynojet Software for details.
The features of the software are as follows:
FILE TABS used to locate and select map files or log files on the device.
FILE LIST BOX displays a list of map files or log files according which File Tab is selected.
MAIN INTERFACE BUTTONS used to perform the following actions:
-Convert Log File(s) to .csv converts .displog files which are for displaying playback on the device to .csv files which contain raw data that may be analyzed on the computer.
-Show Device Info displays firmware and serial number information about the device.
-Get Selected File(s) brings the files chosen from the device to the computer.
-Send Files To Device sends the files chosen from the computer to the device.
-Delete Selected File(s) erases the files chosen from the device.
CONTROL BAR
Actions a menu of actions identical to those performed with the Main Interface Buttons as well as two other less frequently required actions.
Options used to select detail and format aspects of files exported.
1. Open Display File Manager.
Connect the USB cable included with the device from the device USB port to the computer. One or two messages regarding device driver installation may appear and you should click OK, Yes, Close or X according to what is necessary to accept the device driver.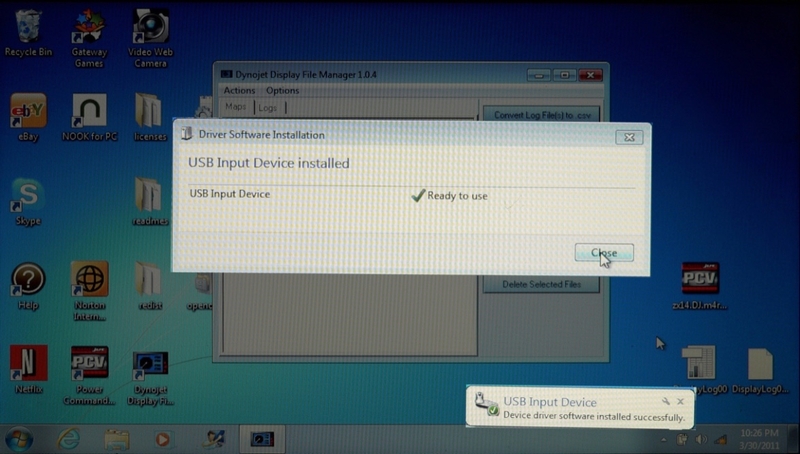
2. Go to the File Tabs. The file tabs are how files stored on the device are accessed by the computer.
Click the Map tab.
If there is a map file stored on the device memory card, the map file name will appear in the File List Box.
Click the Log tab.
If there is a log file stored on the device memory card, the log file name will appear in the File List Box.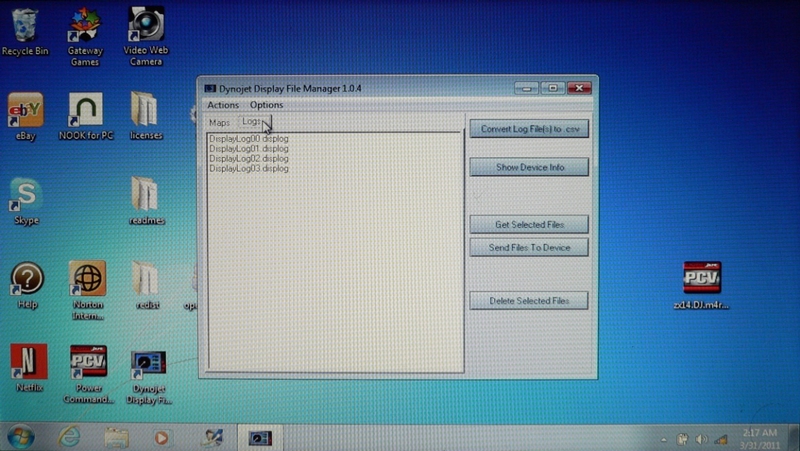
3. In the Control Bar, click Options > Log File Export Options.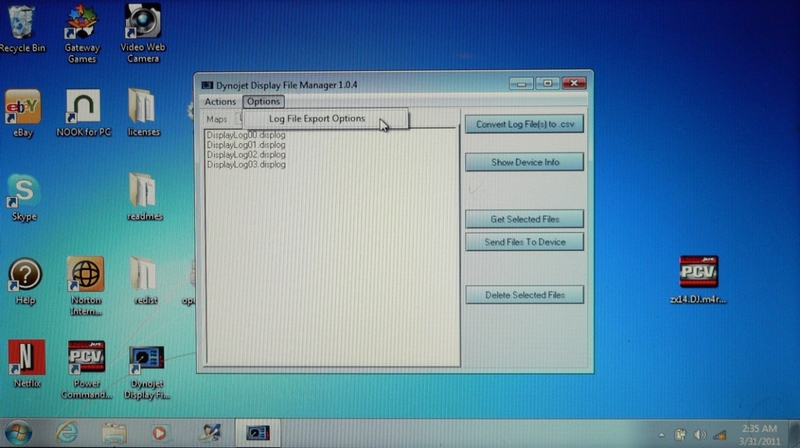
4. A box with interval and convert options opens.
To import log files, you will need to select the interval between data samples. The shorter the interval, the more complete the data will be but you may wish to view samples at longer intervals to get a more general idea of what happened in the run. The default interval is 1.0 seconds. This will put one second between each row of data in the spreadsheet. To view every data sample recorded, select 0.1 seconds for the interval.
Enter the interval between samples you want to view in spreadsheets by clicking and dragging the current Export Time Interval (sec) and typing in the interval of your choice. Alternately, you may click the dropdown menu arrow for Export Time Interval (sec) and select the interval you want.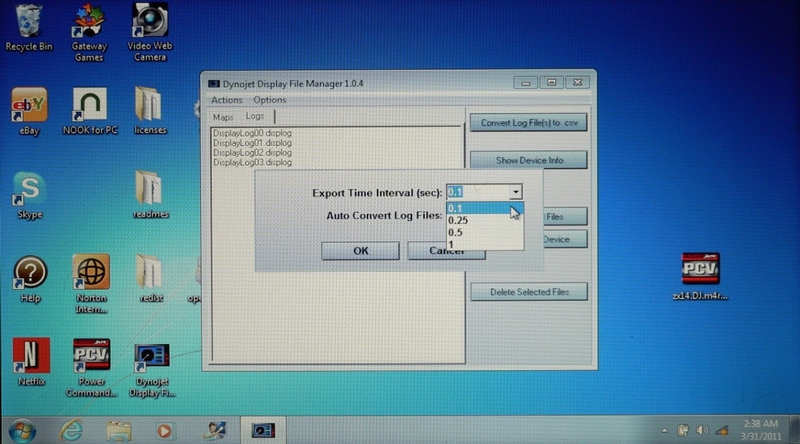
You should select Yes in the dropdown menu for Auto Convert Log Files to have all .displog files converted to .csv files by default when they are imported.
Select No for all files to be imported as .displog files. You will need to convert such log files manually with the Convert Log File action if you wish to view them.
Click OK to save changes and close
OR
Click Cancel to close with no changes to the previous settings.
5. Go to the Control Bar and click Actions.
A menu will open from which you may select from seven actions of the software. The five regularly used actions listed may be executed more conveniently by using the Main Interface Buttons on the righthand side of the software.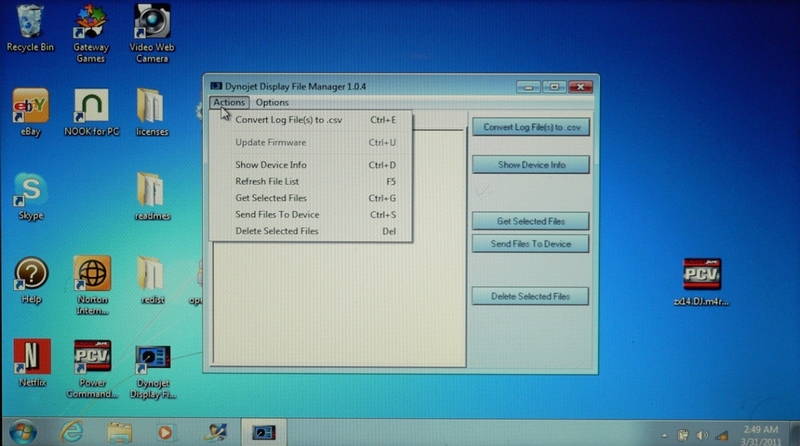
Convert Log File
Opens the list of .displog files on the computer (not the device) and allows you to select files that you wish to convert to .csv files. You will not normally need to use this function if you have selected Auto Convert Log Files in step 4.
Update Firmware
The Update Firmware selection will be disabled unless the device is in boot loader mode. If you feel your device’s firmware requires updating, refer to page 18 of Dynojet’s LCD-200 tutorial or user manual for the POD-300. I don’t suggest experimenting with updating firmware unless you consult with a Dynojet tech who recommends it. A firmware update will only be necessary to turn an LCD-100 into the later 200 model.
You will need to put the LCD in boot loader mode by pressing all three buttons simultaneously while the LCD is connected by USB cable to a computer having the latest LCD firmware downloaded to it. The POD should have its own firmware and method to activate boot loader mode. Open Display File Manager and click Actions > Update Firmware.
Show Device Info
Opens a box with the firmware and serial number information of the device connected to the computer.
Refresh File List
Clears and updates the current list of map files or log files. This happens automatically when any file is exported or deleted or when the tab is selected so there will probably never be a need for this action.
Get Selected Files
Copies .pvm (map) or .displog (log) files from the device and sends them to the computer.
Send Files to Device
Sends map files or log files from the computer to the device.
Delete Selected Files
Erases files from the LCD memory card.
Click the Logs or Maps tab and select files from the LCD that you would like to execute the following actions on. You may hold the Shift or Control key on the computer keyboard while clicking to select multiple files.
The five Main Interface Buttons on the righthand side of the software window are used to perform the commonly used functions of Display File Manager.
6. Get Selected Files.
Logs or Maps > Select the file(s) you want to import > Get Selected Files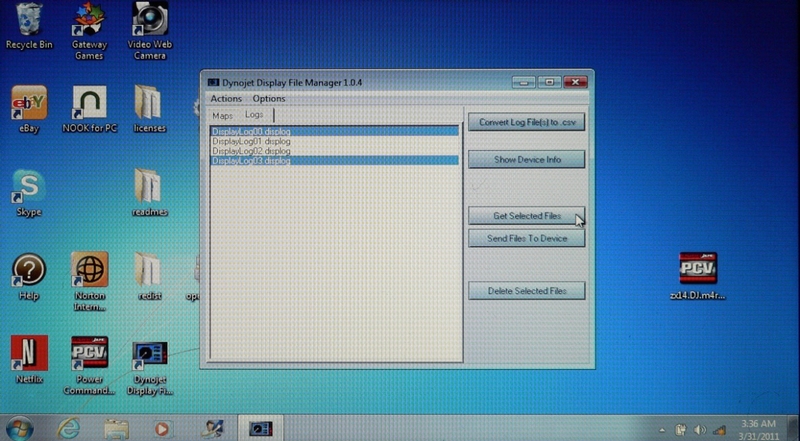
Choose a destination for the files (Desktop is always easiest to locate) from the Browse For Folder box.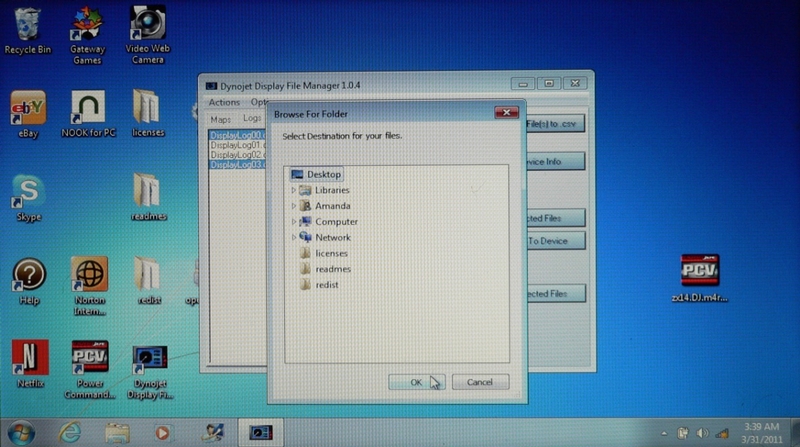
Click OK to import the selected files from the device to the computer and close the Browse For Folder box.
OR
Click Cancel to close the Browse For Folder box without importing files.
7. A box with progress bars will open. When the bar indicates the import is complete, the selected files will be sent to the chosen destination. 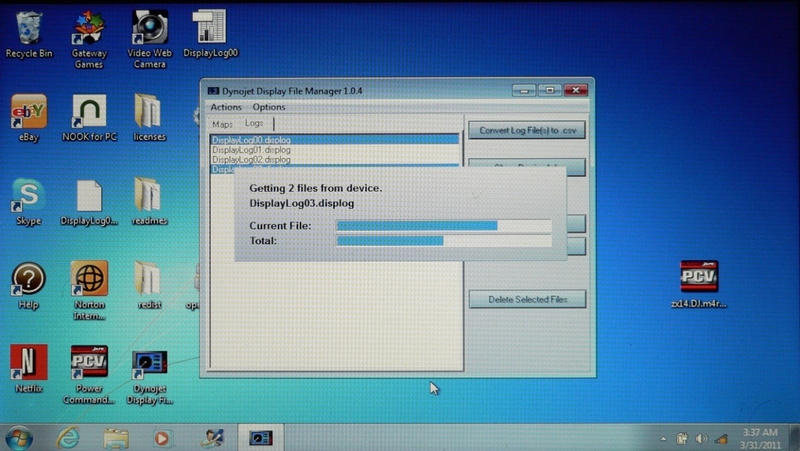
If you have Auto Convert Log Files selected (step 4), you will find a .displog file with a matching file that was converted to .csv for each selected log.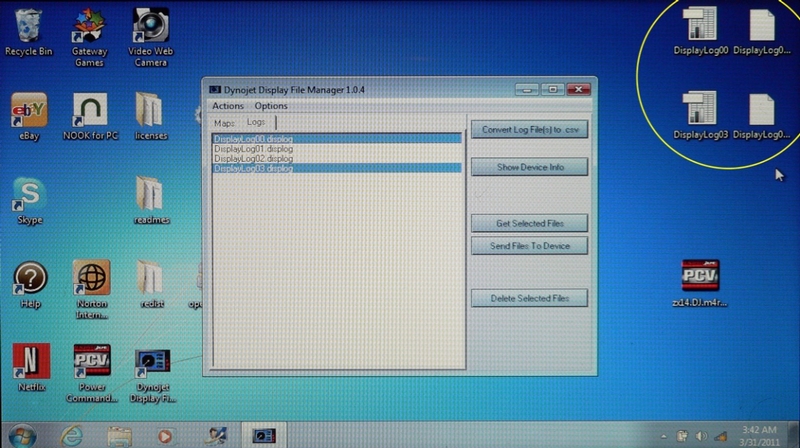
8. Send File To Device
Logs or Maps > Send File To Device 
Select the location of the files from the Open box > select the files > Open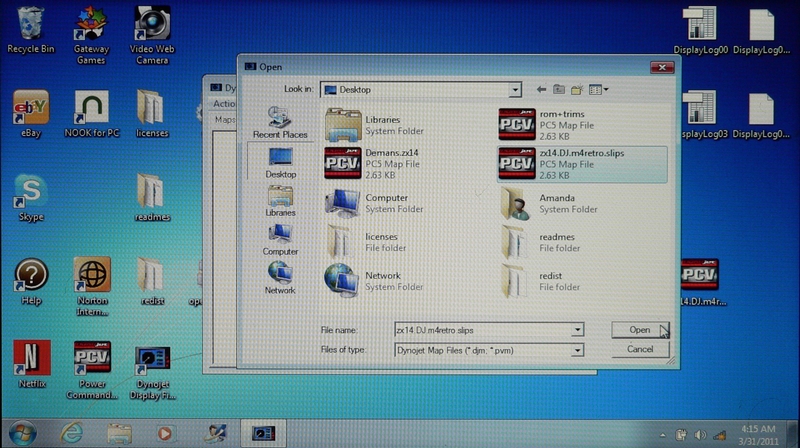
A box with progress bars will open during the export. The files will appear in the File List Box under the appropriate file tab when exporting the file to the LCD is complete.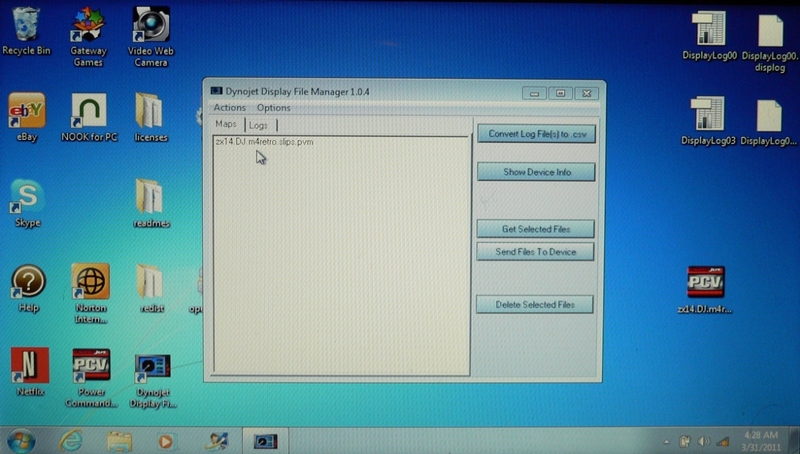
9. Delete Selected Files
Maps or Logs tab > select the files you wish to delete > Delete Selected Files.
The selected files will vanish from the File List Box.
**WARNING—once you hit Delete Selected Files, the files are GONE!!! It’s not hard to delete files by accident on laptops with sensitive click buttons. I suggest saving all to the desktop first if you must delete from the LCD by laptop. It’s probably safest to delete the files using the device Delete Selected Files button.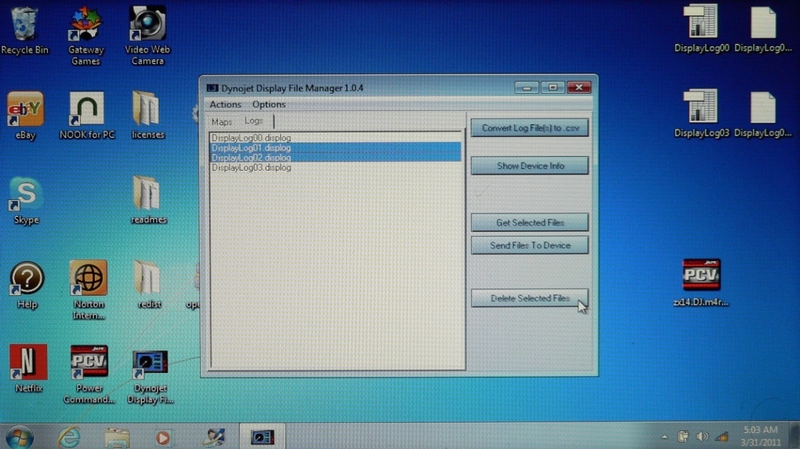
10. Convert Log File(s) to .csv
Logs > Convert Log File(s) to .csv
An Open box opens. Select the location the .displog files you want to convert to .csv files.
Select the files you want to convert > Open.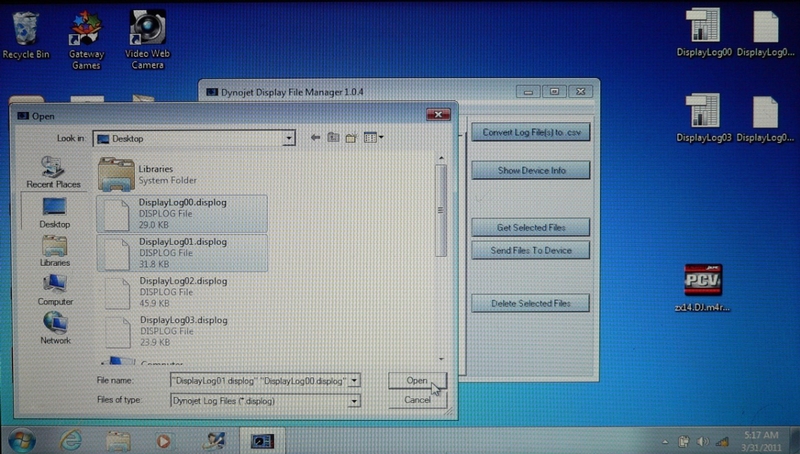
The .displog files will be copied and converted to .csv and sent to the computer. If Auto Convert has already imported these files as .csv, a message will notify you that the files have already been imported. Click OK.
11. Show Device Info
A box will open with the firmware and serial number information of the device connected to the computer.
Click Close to close the device info box.
12. You will require a software with spreadsheets to view data from .csv files. For free spreadsheets software, refer to Viewing Data Logs With Apache OpenOffice.
See steps 1 through 8 of HOW TO LOAD MAPS AND AN OVERVIEW OF POWER COMMANDER 5 V 1.0.6.4 to download software and view .pvm map files.
13. X out to close Display File manager.
* Last updated by: Rook on 1/13/2018 @ 12:00 AM *