


Crankshaft Positioning
The crankshaft needs to be positioned precisely to time it with other parts of the engine.
Tools
17mm socket
Do First
Remove the Crankshaft Sensor Cover (CRANKSHAFT SENSOR COVER, steps 1 and 2).
1. Use a 17mm socket to turn the hex head on the center of the timing rotor
CLOCKWISE in the direction indicated by the arrow stamped on the timing rotor. Never turn the engine counterclockwise. 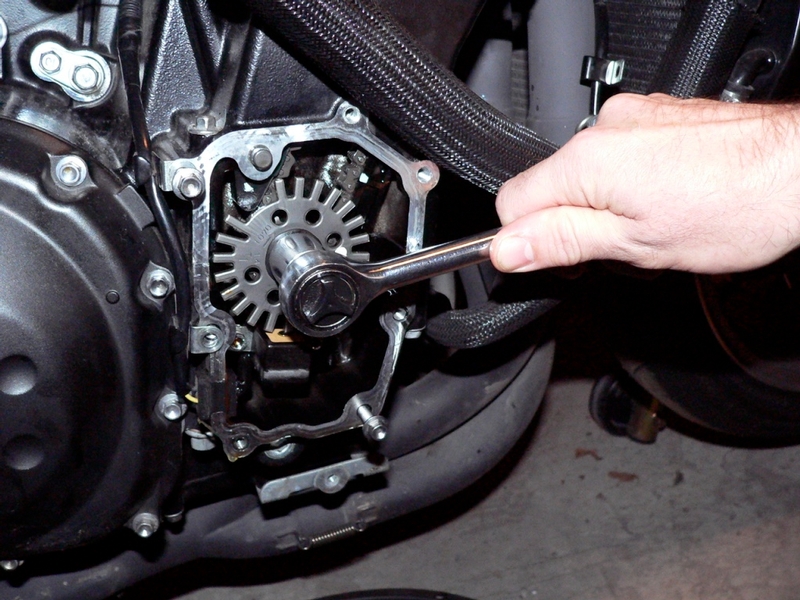
2. Align the 1.4 T and the 2.3 T marks up with the marks on the edge of the engine
case. When the 1.4 T mark lines up with the mark toward the back of the compartment (as shown in the pic below), either cylinder #1 or #4 is at Top Dead Center of the end of the Compression Stroke. Other aspects of the motor need to be observed to determine wether it is cylinder #1 or #4 that is at TDC (See Introductory Notes of my tutorial, Valve Clearance Check and Adjustment.. Also steps 1-3 and step 7 of that tutorial)
If you turn the Timing Rotor past the mark on the engine case when positioning the Crankshaft, DO NOT TURN THE MOTOR BACKWARD. Continue turning clockwise 360 degrees to come back to where the marks on the case and the wheel line up. 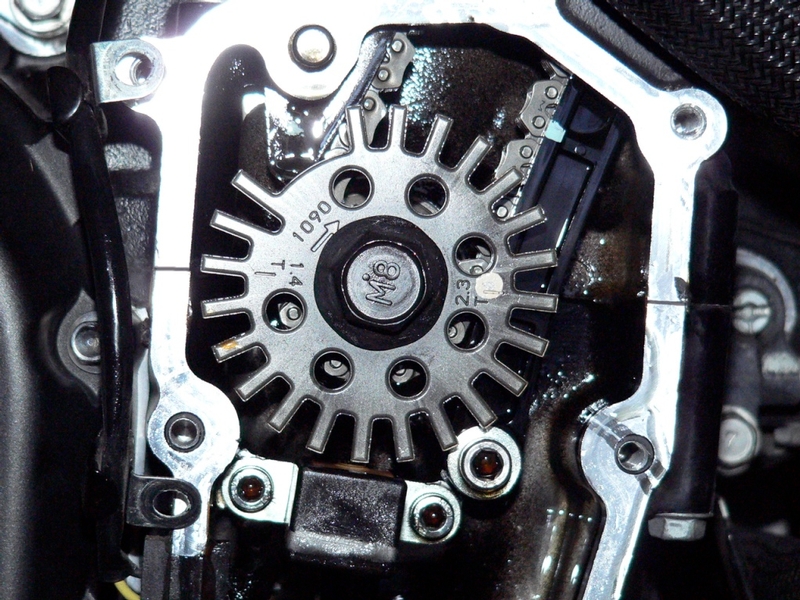
Reinstall the crankshaft sensor cover with bolts threaded finger tight to prevent engine contamination if you will be leaving the job unfinished for any length of time.
Install the Crankshaft Sensor Cover (CRANKSHAFT SENSOR COVER, steps 3 through 6).
* Last updated by: Rook on 7/30/2017 @ 9:37 AM *