


Tail Subframe Removal
Do not carry passengers or gear on the tail of the bike with the subframe removed.
The subframe is often what the entire frame from the back of the seat to the tip of the tail is referred to. In this tutorial I am referring to only the lower bolt on section of the tail. The top section is welded to the main frame and it should be ample to support the tail of the bike and a few lightweight items. I do not consider the top tail frame alone to be strong enough to carry anything over about 15 lbs on the tail. The rider’s weight will be supported by the side pieces of main frame that are below the rider’s seat.
I like the look of the bike better without the tail subframe and it is a significant weight reduction mod. It also opens up space and provides bolt holes for a few other items I plan to attach to the bike.
Tools:
phillips screwdriver
14 mm open end wrench
Do First:
Remove fuel tank (see Fuel Tank Removal, steps 1-10.)
Remove the mudflap bracket (see Fuel Tank Bracket and Mud Flap Bracket Removal, Step 1.)
Remove triangular tail piece and the Left and right tail fairings (see Fairings Removal, Tail Piece and Tail Fairings).
Remove Rectifier bracket (see Regulator/Rectifier Removal, steps 1-3).
Removal
1. Remove the seat lock mechanism with a phillips screwdriver.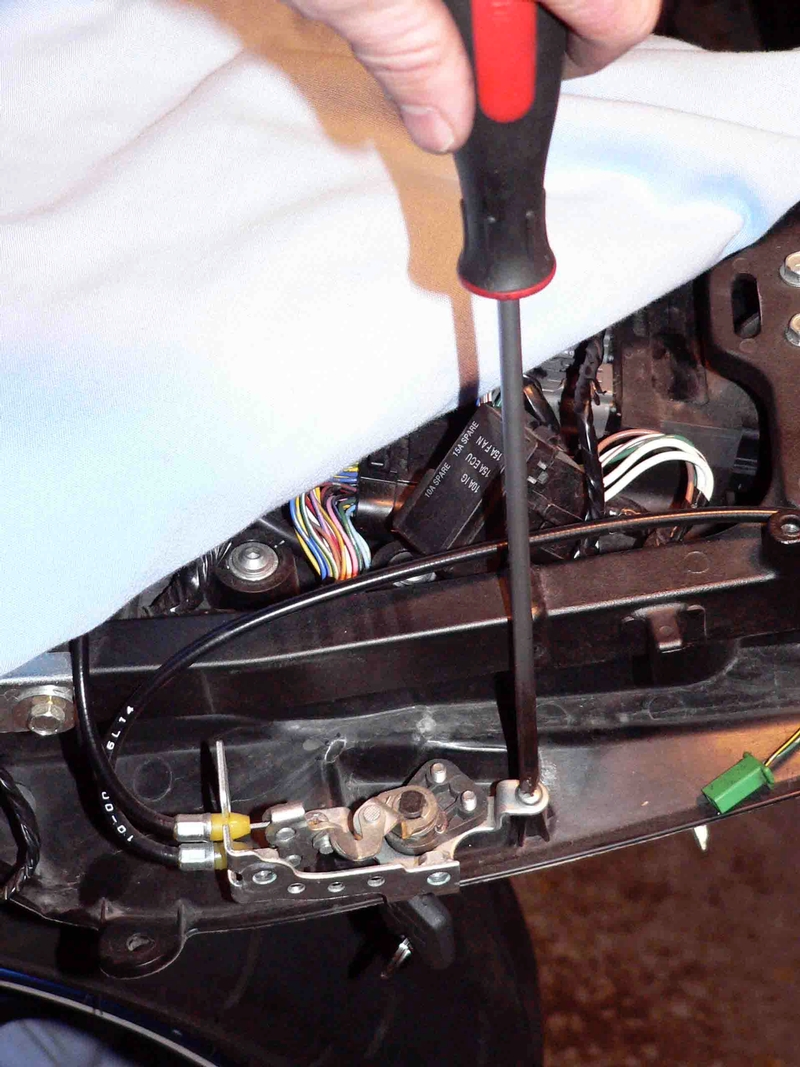
This step is to allow the left subframe to be removed smoothly. The subframe may be slid forward to clear the lock but the paint could be damaged by 0 clearance with other parts.
2. Use a 14 mm open end wrench to loosen the front RH tail subframe bolt. Thread the bolt out with your fingers. The mudflap may be shifted over the the left and flexed inward slightly to allow clearance for the head of the bolt as it is threaded out. When you feel the bolt has threaded all the way out of the frame, stop. Do not attempt to remove the bolt from the subframe yet. 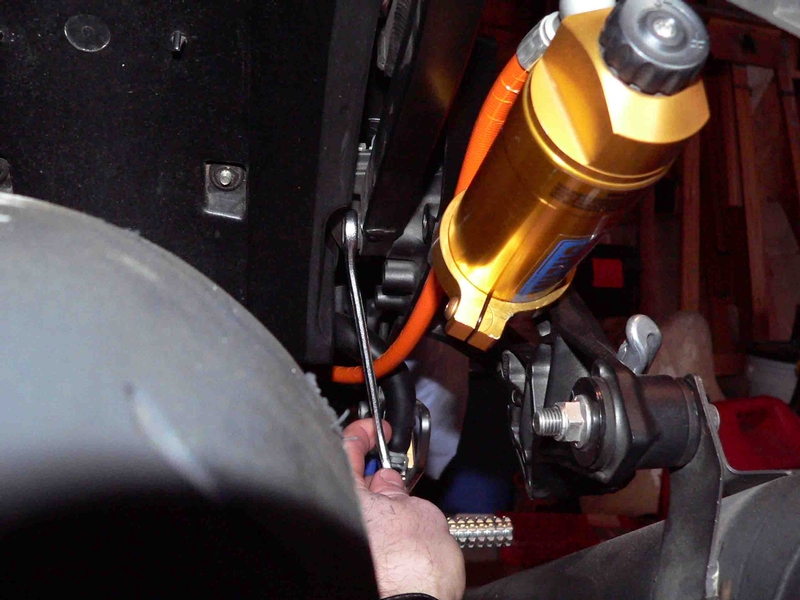
A ratcheting box end wrench may seem like the ideal tool to get into this spot. Don’t try it! It will get trapped between the mudflap and the bolt head. The wrench will not come off and you will not be able to thread the bolt back in to remove the wrench (unless you have a two way ratchet). You will be screwed.
3. Go to the RH rear subframe nut and remove it with a 14mm wrench. The head of the bolt may require to be held fast inside of the frame with a 14mm open end wrench.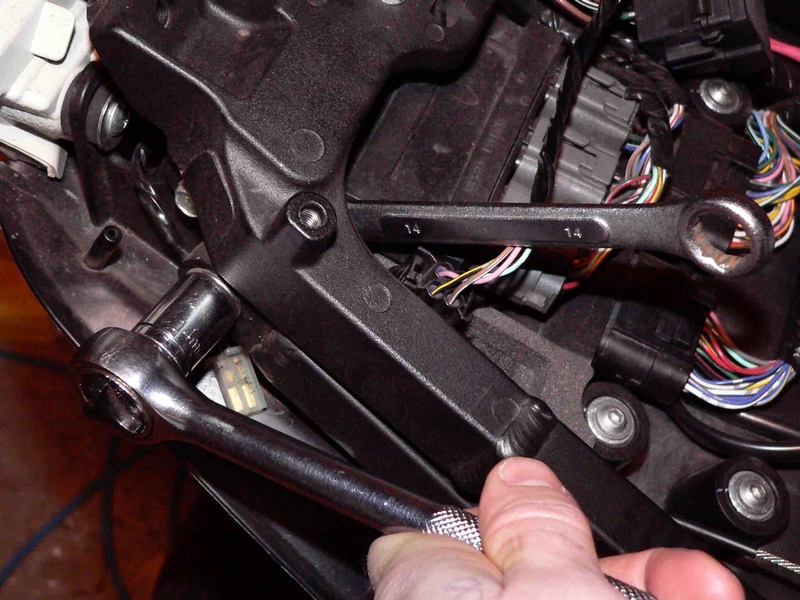
4. Pull the relay box (grey connectors) forward in its rubber holder to allow clearance. Press the rear LH tail subframe bolt in and remove it.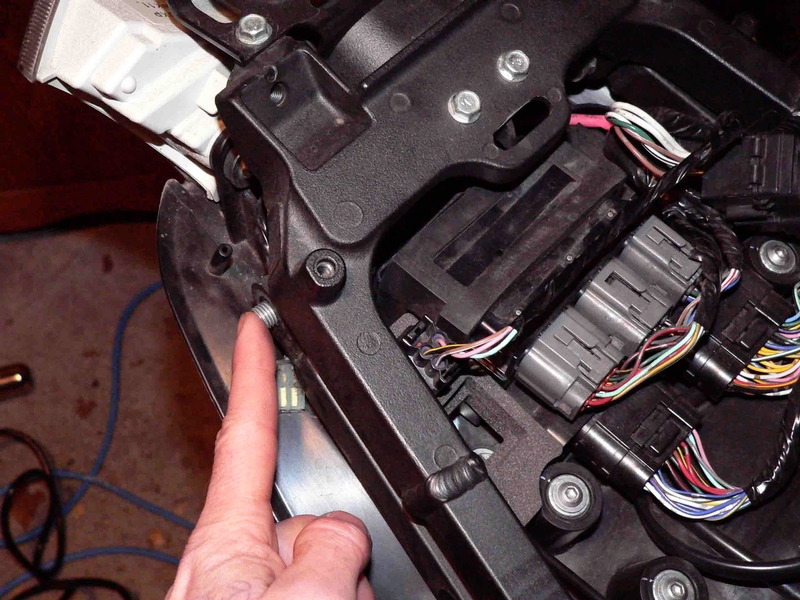
5. Go back to the front tail subframe bolt and press the mudflap inward while twisting the subframe so the bolt head turns downward to clear the mudflap. Remove the tail subframe.
6. Follow steps 3-6 of this tutorial to remove the LH tail subframe.
Installation
Installation is the reverse procedure. The service manual refers to a torque spec which I believe is for the M10 tail subframe bolts and nuts.
Torque - Rear Frame Pipe Bolts: 32 foot lbs, use non permanent locking agent.
Torque - Rear Frame Pipe nuts: 32 foot lbs.
The general torque spec for an M10 bolt is 19~25 ft lbs. I would go with 25 ft lbs and loktite.
Be careful not to over-tighten the seat lock mechanism bolts in the plastic threads of the mudflap. Snug.
Install triangular tail piece and the left and right tail fairings (see Fairings Removal, Tail Piece and Tail Fairings).
Install the mudflap bracket (see Fuel Tank Bracket and Mud Flap Bracket Removal, Step 2.)
Install fuel tank (see Fuel Tank Removal, steps 11-15.)
Install rectifier bracket (see Regulator/Rectifier Removal, Installation).
7. If the tail subframe rails are being eliminated, the OEM rectifier bracket should be replaced with a hand made bracket that securely attaches to the upper tail frame only. I have not done this yet but will update the tutorial when the modded bracket is finished. 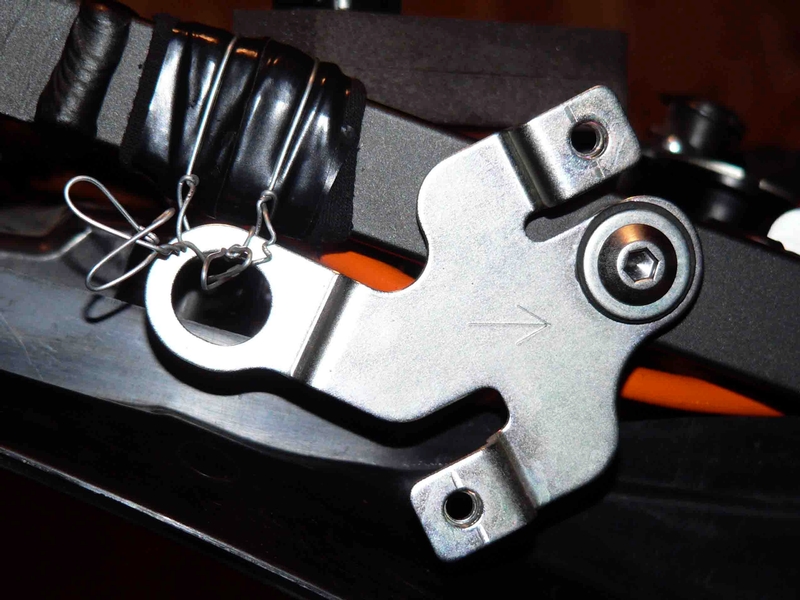
I temporarily installed the OEM bracket by removing the rear bolt, spacer and grommet and fastening the rear hole to the tail frame with wire. The frame was wrapped with cloth and covered with electric tape to protect the finish. It has worked just fine for 300 miles and I doubt a special bracket is a must.
Weight
Tail subframe, mounting bolts and nuts: 1 lb, 10.1 oz.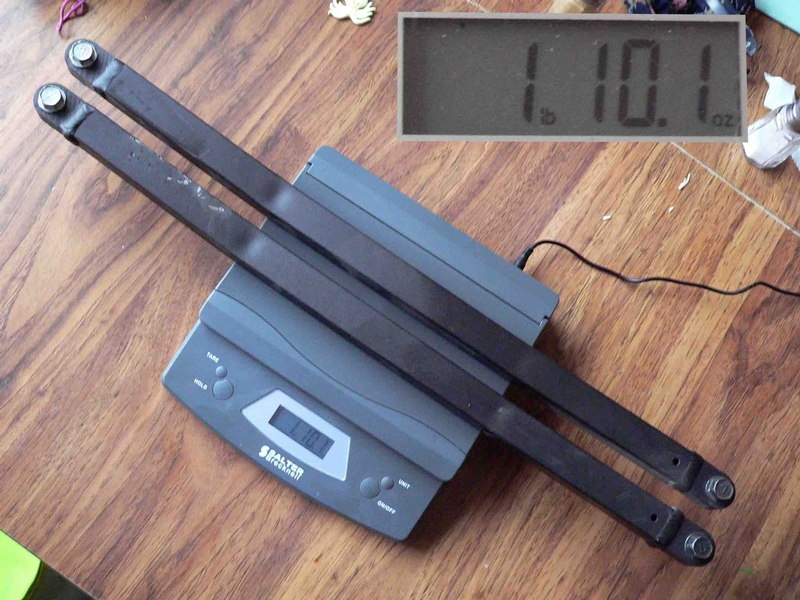
* Last updated by: Rook on 12/23/2015 @ 4:45 PM *