Move Close
Welcome to zx14ninjaform.com!

You are not logged in.
New Topic Reply
Next Page

Page: 1

Previous Page

Thread: Change the color of the gauge backlighting (gen 2)

Created on: 07/07/19 06:06 PM

Replies: 14

SteveStLaurent


SteveStLaurent's Gravatar

Joined: 08/02/18

Posts: 95

Change the color of the gauge backlighting (gen 2)
07/07/19 6:06 PM

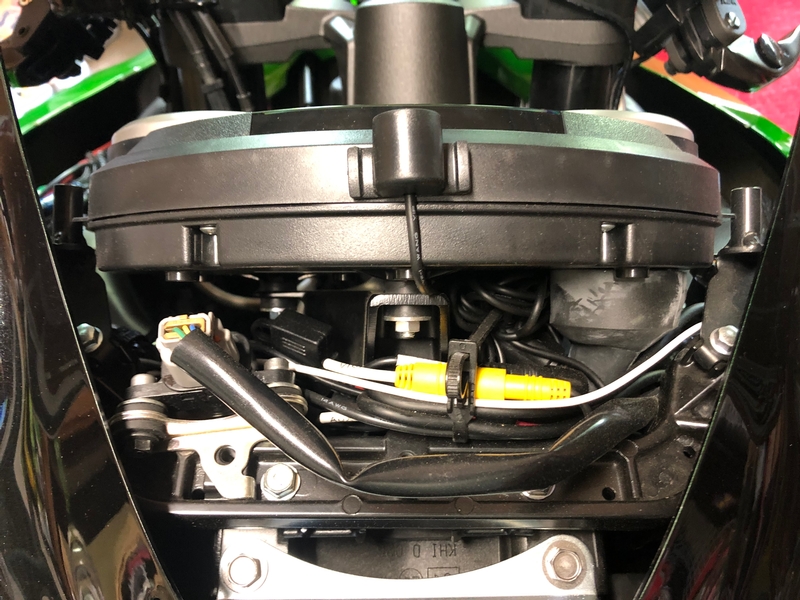
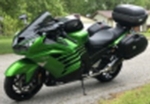
I did this mod for myself and there was interest in a how to so here you go.

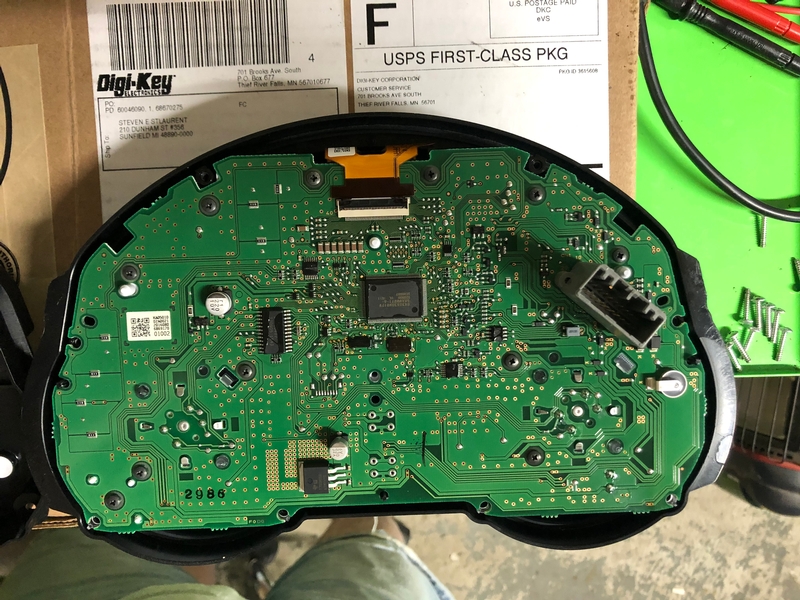
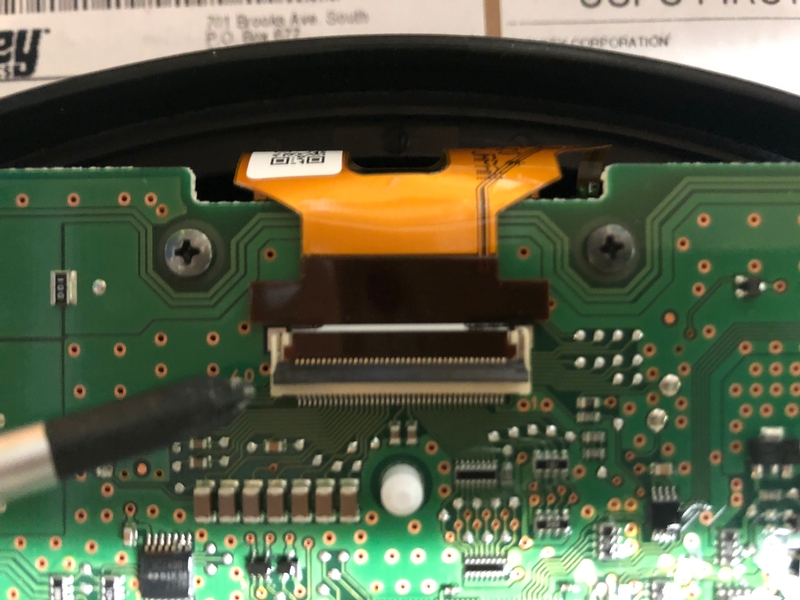
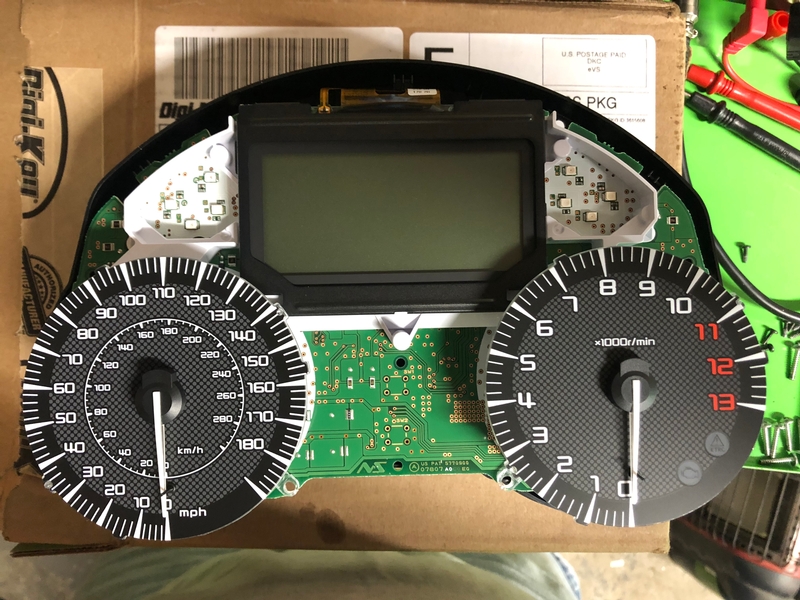
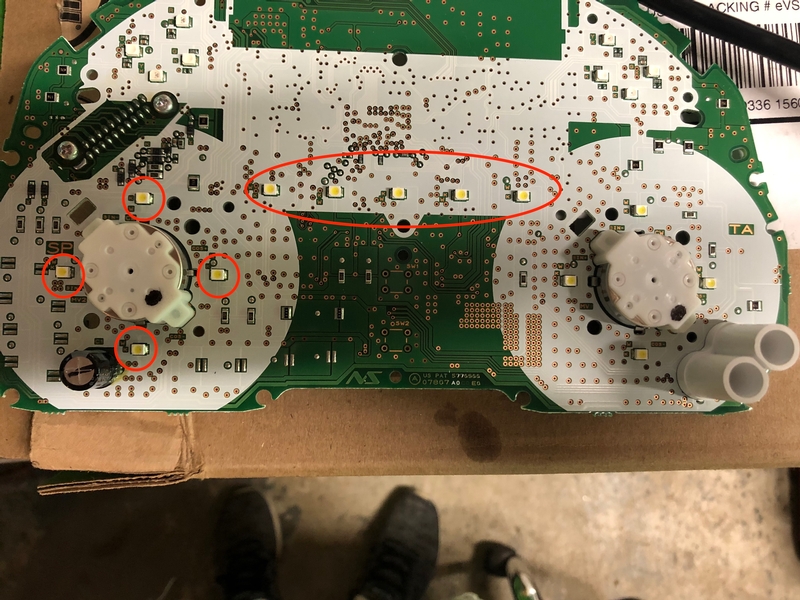
There are a total of 13 surface mount led's that provide the backlighting for the gauges and the LCD display. There are other led's for the warning lights, etc. I need to get this disclaimer out of the way first. This involves desoldering and soldering surface mount led's on an approximately $800 circuit board. I have no idea how it would even work for getting a replacement set of gauges as to the mileage (I believe that's stored in the gauges somewhere). If you fry your circuit board that's on you - I am not suggesting that anyone do this, just that this is how I did it. If you aren't experienced with soldering this is not the place to start. There is a significant risk in doing this. Here's what it looked like before:
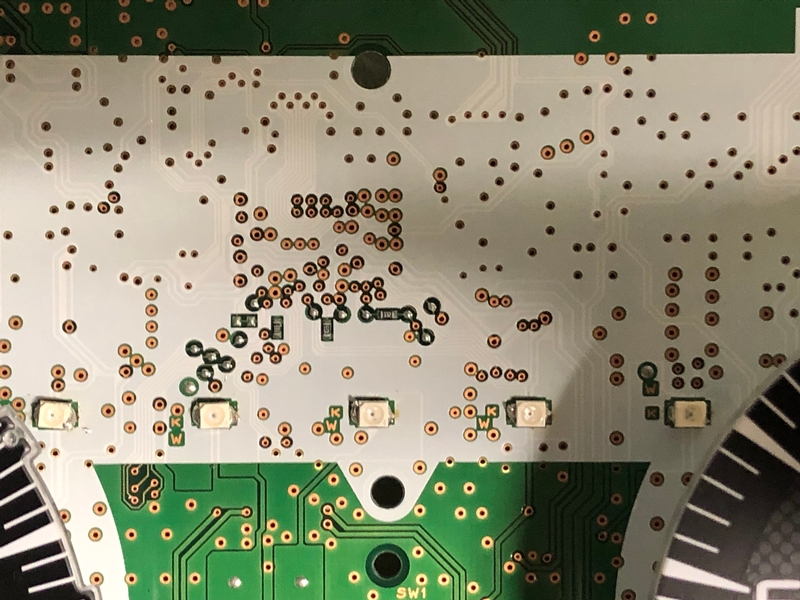
and after:

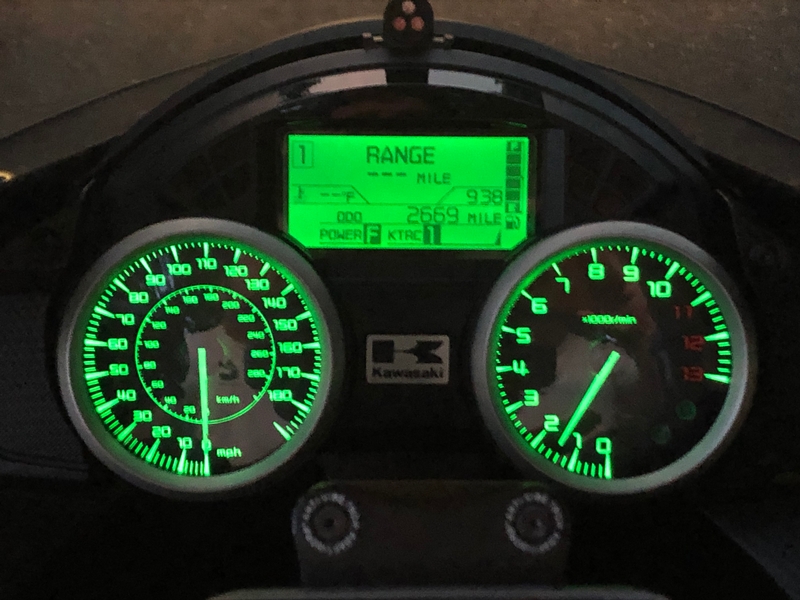
I used these 627.5mcd green leds: https://www.digikey.com/product-detail/en/LT+T67C-T2V1-35-Z/475-2685-1-ND . I bought 25 of them so I had extras to play with and I also got two lower light leds but when I compared them to the stock lights these were the ones I'd go with again - total cost there would have been about $26 for just 1 set of 25.

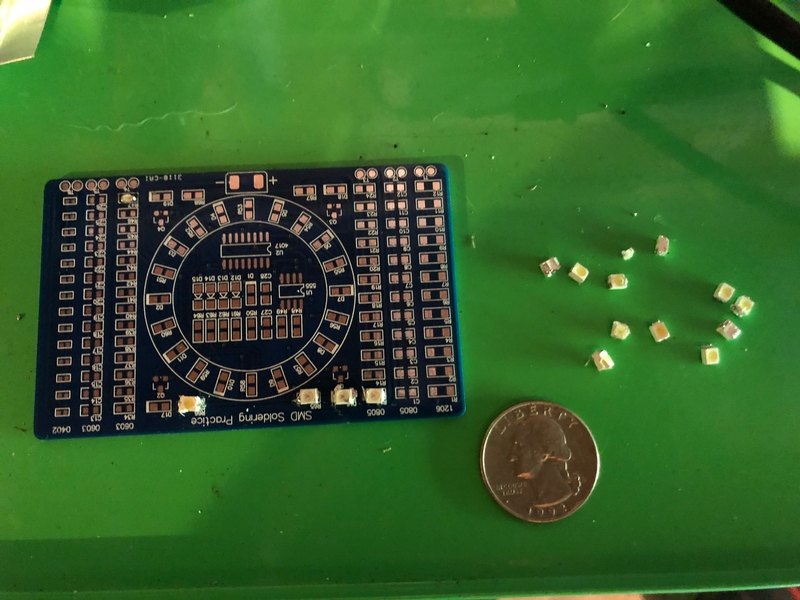
I've never done surface mount soldering before but I have done LOTS of soldering in tight spaces. I found this surface mount practice kit: https://amazon.com/gp/product/B00Y20JYTM for $8 shipped (if your a prime member) and figured that would be great practice. I ended up using the leds that I had since I had extras and I soldered one of each brightness led. I also soldered a couple of the leds that came in the practice kit and unsoldered them to get that down. Here's that test board (and the pile to the right is all of the stock leds I removed - that's a quarter for scale).

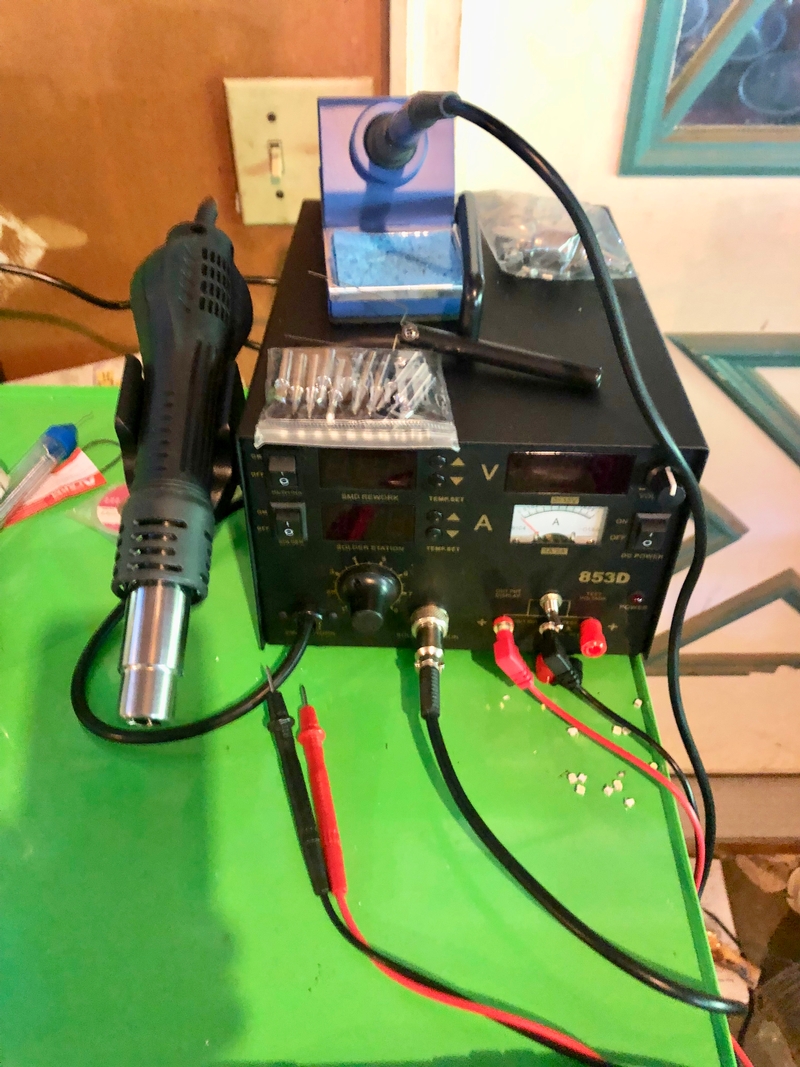
To do this work I used a pretty cheap soldering station (I got mine for $68 off ebay, there's lots of them on there) so that I have very precise temperature control. I also used a tip that came to a very fine point so that I could be very accurate:

to be continued . . . . .


* Last updated by: SteveStLaurent on 7/9/2019 @ 7:56 AM *

Link | Top | Bottom

SteveStLaurent


SteveStLaurent's Gravatar

Joined: 08/02/18

Posts: 95

RE: Change the color of the gauge backlighting (gen 2)
07/07/19 6:49 PM

First thing I had to get my gauges out - pretty easy job. Just removed the windscreen and the gauge cover and there's 3 nuts that hold the gauges on, they're pretty easy to see. There's also a cable going into a rubber boot, I pulled that boot back and unplugged the gauges (making sure from this point on to not turn the bike on until I was done and had the gauges back in).

Then there's a number of bolts that are in the back of the gauges. Just took them all out:

Once that was off (there's a rubber gasket between the halves) I had the back of the circuit board bare:

I pulled all of these screws. One of these was a little longer - I didn't catch it and I couldn't find where it went. If someone does please let me know :) . The gold ribbon cable at the top is for the lcd display. I lifted this lever which released the ribbon cable.

I then placed the back half of the case over the back of the gauges, flipped it over and then had the gauge faces up:

Here's where the led's are under those gauge faces:

To pull the gauge faces so I could get to those led's without doing damage the needles had to come off. I first moved them to their first detent off the stop and then I took very good pictures of where the needles were:


Then I CAREFULLY pried the needles out using some plastic panel levers I have lying around - you can find them at harbor freight. I used those and I put a thick scott shop towel under it so it didn't leave a mark on the face of the gauge. I made sure not to turn the needle at all.

Once the needles were off the faces lifted right off as did the lcd portion up top leaving:

The five leds in a row circled in red are the backlighting for the lcd, on the left is the speedo and I circled the 4 leds there. The same 4 exist over on the tach but notice it's a little tighter there so I didn't want to block the view over there. At this point it was just a matter of desoldering the stock leds and soldering the new ones in - being careful for polarity. Here's the new leds for the lcd backlighting (not nearly as neat as the factory soldering but it'll work):

From there it was just reassembly. Putting the gauge needles back in I was VERY careful to line them up exactly where the pics showed and then I moved them back to the stop. Before assembling the gauges I checked to make sure there were no smudges on the gauge faces (there were) and on the inside of the glass (there wasn't. Got that all cleaned up and then button them up in reverse order of the disassembly. Got everything put back together (I held off on the 3 nuts that hold the gauges on until I was sure it was right - so I plugged the harness in first and then tried it. Everything worked perfect, first time.


* Last updated by: SteveStLaurent on 7/7/2019 @ 6:57 PM *

Link | Top | Bottom

JimGnitecki


Location:

Vancouver Island, Canada

Joined: 01/14/19

Posts: 326

RE: Change the color of the gauge backlighting (gen 2)
07/07/19 7:35 PM

Nice work, Steve! And a very nice outcome per your other thread.

Jim G

Link | Top | Bottom

Batt5


Location:

Central Valley Calif

Joined: 07/28/15

Posts: 64

RE: Change the color of the gauge backlighting (gen 2)
07/07/19 11:05 PM

.......... WOW .................... Love it...

Link | Top | Bottom

Rook


Rook's Gravatar

Joined: 03/28/09

Posts: 20579

RE: Change the color of the gauge backlighting (gen 2)
07/08/19 10:28 AM

Nice job, Steve. Thanks!


'08 MIDNIGHT SAPPHIRE BLUE Now Deceased

Link | Top | Bottom

Hub


Hub's Gravatar

Joined: 02/05/09

Posts: 13710

RE: Change the color of the gauge backlighting (gen 2)
07/08/19 2:20 PM


Tormenting the motorcycling community one post at a time

Link | Top | Bottom

SteveStLaurent


SteveStLaurent's Gravatar

Joined: 08/02/18

Posts: 95

RE: Change the color of the gauge backlighting (gen 2)
07/09/19 10:28 AM

Nice work, Steve! And a very nice outcome per your other thread.
Jim G

You mean having my bike stolen and buying a new one?


* Last updated by: SteveStLaurent on 7/9/2019 @ 10:35 AM *

Link | Top | Bottom

JimGnitecki


Location:

Vancouver Island, Canada

Joined: 01/14/19

Posts: 326

RE: Change the color of the gauge backlighting (gen 2)
07/09/19 11:37 AM

No I meant your first thread on this before Rook asked for the "how to"! But, yes, you sure made lemonade out of lemons on the theft in Austin!

Jim G

Link | Top | Bottom

SteveStLaurent


SteveStLaurent's Gravatar

Joined: 08/02/18

Posts: 95

RE: Change the color of the gauge backlighting (gen 2)
07/09/19 12:23 PM

Got it

Link | Top | Bottom

Rook


Rook's Gravatar

Joined: 03/28/09

Posts: 20579

RE: Change the color of the gauge backlighting (gen 2)
07/09/19 4:05 PM

Hey, yeah!! Didn't know your old bike was pinched on you. Glad you got new one and hope insurance was big help!!


'08 MIDNIGHT SAPPHIRE BLUE Now Deceased

Link | Top | Bottom

SteveStLaurent


SteveStLaurent's Gravatar

Joined: 08/02/18

Posts: 95

RE: Change the color of the gauge backlighting (gen 2)
07/09/19 7:45 PM

Sure did. Bike was 8 months old and loaded with stuff. My total out of pocket ended up being around $400 (plus 8 months of payments but my bike now had 5100 fewer miles on it) and that's including the flight to NC from Texas to pick up the replacement. Then I did everything on the new one that was on that old plus. If they were parked side by side it'd be difficult to tell them apart.

Link | Top | Bottom

extrapolator


extrapolator's Gravatar

Location: N Cent FL

Joined: 08/11/14

Posts: 1824

RE: Change the color of the gauge backlighting (gen 2)
07/10/19 10:25 AM

W O W you're a mad man!


=x+rap01a+0r

Link | Top | Bottom

Zorro


Zorro's Gravatar

Joined: 05/29/13

Posts: 14

RE: Change the color of the gauge backlighting (gen 2)
12/20/19 9:02 PM

Link | Top | Bottom

Rook


Rook's Gravatar

Joined: 03/28/09

Posts: 20579

RE: Change the color of the gauge backlighting (gen 2)
12/21/19 2:05 PM

SWEET! Digging that TT logo you have in there too!


'08 MIDNIGHT SAPPHIRE BLUE Now Deceased

Link | Top | Bottom

Buzz636


Location: Alsace, France

Joined: 03/10/21

Posts: 3

RE: Change the color of the gauge backlighting (gen 2)
08/21/22 11:13 AM

Hi, thanks for this tuto.
I change my led today, with white 1100. It's better on sun, but I have to say I'm a little bit disappointed.
Better, yes, but not as wonderful I hopped.
4 hours to make it cool.
Soldering is not very easy: pieces are very small. I began with the smallest pin of solder: not good to have enough warm.I ended with the big one pin (like a screwdriver) and it was much easier.
Have a nice day
Marc

The long screw is the second one left down

Link | Top | Bottom


Welcome to zx14ninjaform.com!
 
New Topic Reply
Next Page

Page: 1

Previous Page

New Post

Please login to post a response.